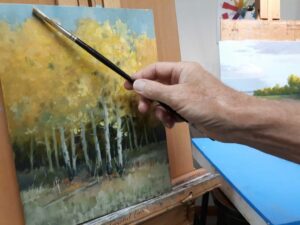
After a session of painting in the studio or en plein air, do you find yourself questioning why your back, neck, shoulder, elbow, wrist or hand are uncomfortable or painful? Does the pain last for more than an hour? Does it interfere with sleeping or other activities?
My husband, Bruce, resumed oil painting shortly after retiring over 5 years ago. Earlier this year, he attended a wonderful plein air workshop in France by Jane Hunt (workshopsinfrance.com) and I went along as a non-painting spouse. (I’m an occupational therapist/OT with an ergonomics and injury prevention specialty, and many years’ experience in an outpatient rehab clinic treating a wide-variety of work-related, as well as non-work-related, injuries and illnesses.) During the course of the workshop, I was able to assist an artist who was experiencing significant neck, shoulder and upper back symptoms that were impacting her ability to participate. Kinesiotaping, use of an ice pack and targeted gentle stretching helped to decrease muscle tightness. This, along with discussing set-up and easel/canvas orientation along with awareness of neck and upper back posture, and positioning of shoulders helped to keep symptoms under control. Further discussion included points to cover with her physical therapist and doctor when she returned home.
As a result of this experience, I was asked to write a post for the OPA blog. This is the first post with a focus on fingers, thumbs, hands and wrists. (Future posts will address the elbow, shoulder, neck, upper back and visual system.) The intent of this post and information is not to override or interfere with diagnosis and treatment recommended by your physician, occupational or physical therapist or other healthcare provider nor to keep you from seeking medical attention if needed. The intent is to increase awareness regarding posture, how we position and use our upper extremities, and how this can impact comfort and symptoms. Very basic anatomy and physiology will be covered, along with stretches focused on specific parts, and basic modalities (cold and hot packs) and treatment options (kinesiotaping, splinting).
During the course of my career, it became apparent that:
- Many people lack awareness regarding their posture and how awkward working postures and positioning can lead to pain and a variety of symptoms, including muscle tightness and imbalance, trigger points, numbness and/or tingling, and pain. People tend to forget to “check-in” with themselves when immersed in a project, and they will unknowingly maintain an uncomfortable posture or position for an extended period of time. Injuries, illnesses and/or syndromes can develop as a result of an acute episode or cumulative trauma, and underlying medical conditions can worsen (e.g., carpal tunnel syndrome, cubital tunnel syndrome, Guyon canal syndrome, osteoarthritis, rheumatoid arthritis, lateral or medial epicondylitis, tendinitis). Even when a posture or position is neutral and balanced, it shouldn’t be sustained for a prolonged period of time; i.e., we need to move and stretch even when our basic working posture or position is good. Regular, frequent movement and stretching becomes critical when our posture or position is less than neutral and balanced – less than ideal.
- The visual system, the eyes, are the “boss.” They will dictate posture and position. For example, if the eyes can’t see comfortably and clearly when working on the upper portion of a canvas, they will “demand” that you tip your head back with your neck in extension so they can gaze more downward with the eyelid covering more of the eyeball. This downward gaze used for close work leads to more frequent blinking, which helps to lubricate the eyes, which makes the eyes “happy;” i.e., the eyes are comfortable but at the expense of the neck, shoulders and upper back. This type of awkward rounded upper back and shoulders, with head forward and tipped back posture is seen when a computer monitor or canvas on easel is positioned too high for comfortable viewing, especially when the computer worker or painter wears progressive, bifocal or trifocal lens glasses. In addition to neck and upper back pain, this type of posture can lead to symptoms in the upper extremities, such as those found with “Thoracic Outlet Syndromes” (TOS).
The quick take-away is to set up your easel and canvas so that you can maintain a good balanced working posture but don’t forget to check the visual system and make sure your eyes will allow you to maintain this good posture. I’ve seen people set up and before they begin working, overall their standing posture is good with their head well-balanced over their shoulders, chin and neck in a neutral position; however, as soon as they start painting, their head tips back and their chin juts forward and up (neck in an extended position) as their back and shoulders round because their eyes demand comfort and ease of viewing when focused on the upper portion of the canvas.
I will cover trigger points, neck, shoulders and upper back, TOS, and the visual system in more detail in future posts.
Today’s post is focused on hands and wrists.
From Examination of the Hand and Wrist (Tubiana, R., Thomine, J., and Mackin, E.; 1996):
“The hand is remarkably mobile and malleable. It is capable of conforming to the shape of objects to be grasped or studied, and of emphasizing an idea being expressed. These possibilities and varieties of function are realized through the unique structure of this organ, which consists of 19 bones, 17 articulations, and 19 muscles situated entirely within the hand, and about the same number of tendons activated by the forearm muscles.”
“The functional architecture of the hand offers this organ multiple possibilities of adaptation, exploration, expression, and prehension. The hand joins, in the same anatomical structure, the powers of knowledge and action. It is both the origin of very precise information and the irreplaceable executor of the wishes of the brain. The hand is the privileged messenger of thought.”
For a good, basic review of hand and wrist anatomy and physiology, I recommend “The Anatomy Coloring Book” by W. Kapit and L.M. Elson (Pearson Education, Inc.). This book covers skeletal and articular systems, including wrist and hand bones and joints; the skeletal muscular system, including intrinsic movers of the hand joints; the peripheral nervous system, including the brachial plexus and nerves to the upper limb (anterior division: musculocutaneous, median and ulnar nerves; posterior division: axillary and radial nerves).
Checking-In with Yourself:
The following stretches (and other similar stretches) can be a good way to “check-in” with yourself, as well as being used as part of a treatment plan.
As an occupational therapist, after completing a thorough evaluation, I instructed clients in specific stretches and exercises depending on their condition and diagnosis (as well as assessing their activities of daily living and determining their work and activity recovery goals).
These stretches and exercises were focused on improving range of motion by lengthening muscles and tendons and helping to “lubricate” joints, and typically on strengthening and decreasing discomfort and pain while addressing swelling or edema if that was an issue. When joints were inflamed or too painful, stretching and exercises were adjusted or discontinued (for the time-being) and the focus was on using modalities and other treatments to address inflammation and pain. With appropriate stretching and range of motion exercises as part of a self-care program, most clients were able to return to previous activities and meet most or all of their goals.
Frequently this was done in conjunction with making adjustments to their work stations and work tasks to make them more ergonomically sound.
For an oil painter, work station or work task adjustments may include:
- Remembering not to hold the brush any tighter than necessary (i.e., don’t use the “grip-of-death” when applying paint); consider using a brush with a larger or smaller handle.
- Adjusting your stance, as well as your elbow and shoulder position to avoid deviating your wrist and forearm into an uncomfortable position.
- Adjusting your easel so your canvas is lower to avoid tipping your head back when viewing and applying paint to the upper portion of the canvas.
- If you sit while painting, you may need to raise your chair and use a footrest. You would do this to avoid hunching forward while jutting your chin and head out. The footrest would assist with keeping your feet from dangling (i.e., feet dangling can lead to low back discomfort).
- Painting in a remote location with a less than an ideal set-up to allow for a good working posture; consequently, taking more stretch breaks focused on realigning posture, especially your neck and upper back position, and decreasing the risk of muscle tightness and trigger points.
- Considering other activities that may be contributing to symptoms, such as extensive mouse use and clicking, opening tight lids on jars and tubes, grasping and carrying heavy items, gardening tasks, and determining how these can be modified so they create less stress for finger joints, hands and wrists.
Before beginning any of the following stretch exercises, please review these general guidelines and precautions.
General Guidelines and Precautions for Stretch Exercises:
- If you have current restrictions regarding stretches or exercises from your physician or other healthcare provider, continue to follow these restrictions. If you have been instructed by your healthcare provider to avoid or limit any of the activities mentioned in this post, continue to follow these restrictions until you talk to your healthcare provider and are given clearance to proceed.
- Work within your level and range of comfort. Move at a pace and within a range of motion that is comfortable for you. Be careful not to over-stretch delicate finger and hand joints.
- If a stretch or exercise causes pain, either stop the movement entirely, or try the stretch/exercise using smaller or slower movements. You may also need to decrease the number of repetitions you perform of a particular stretch.
- Initially stretches may only be held for 3-5 seconds with a gradual increase over a period of weeks to 10-20 seconds, or up to 45-60 seconds for larger muscle groups. After stretching, release slowly avoiding sudden releases. Initially, you may also only perform 1 or 2 repetitions (especially for smaller joints) before increasing to 10 – 15 repetitions for 1 to 3 sets.
- Rapid high force stretches can lead to injuries. Perform stretches slowly without jerking or bouncing. Move into a stretched position smoothly and gradually. Continue to the point where you feel a mild tension, then relax as you hold the stretch.
- Use a natural breathing pattern. Don’t hold your breath while stretching.
- Develop Body Awareness! Promote and Maintain Range of Motion and Strength! Prevent Injuries! Feel More Relaxed!
Hand Stretches:
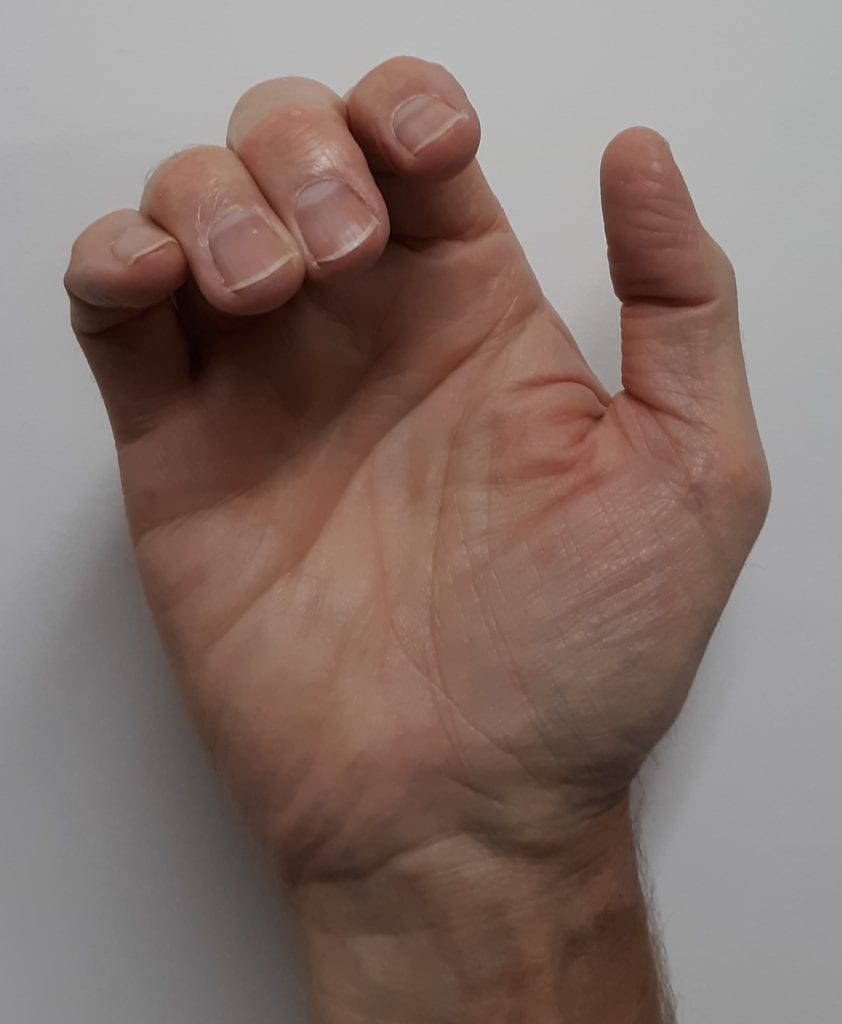
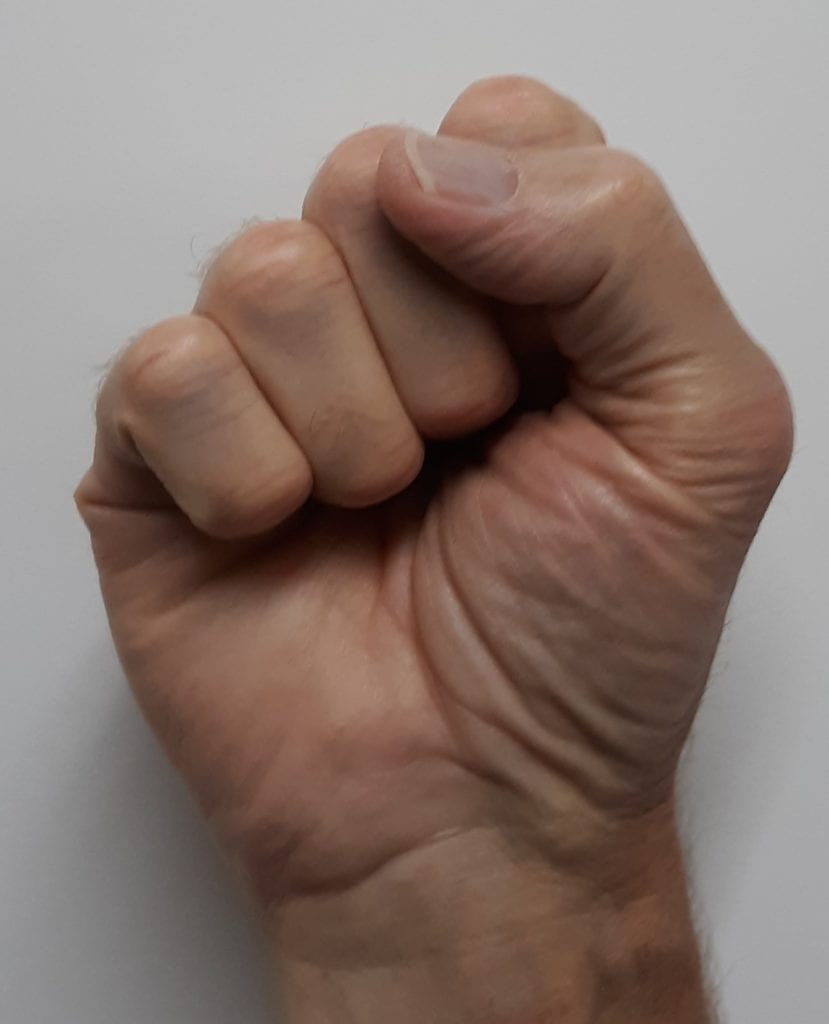
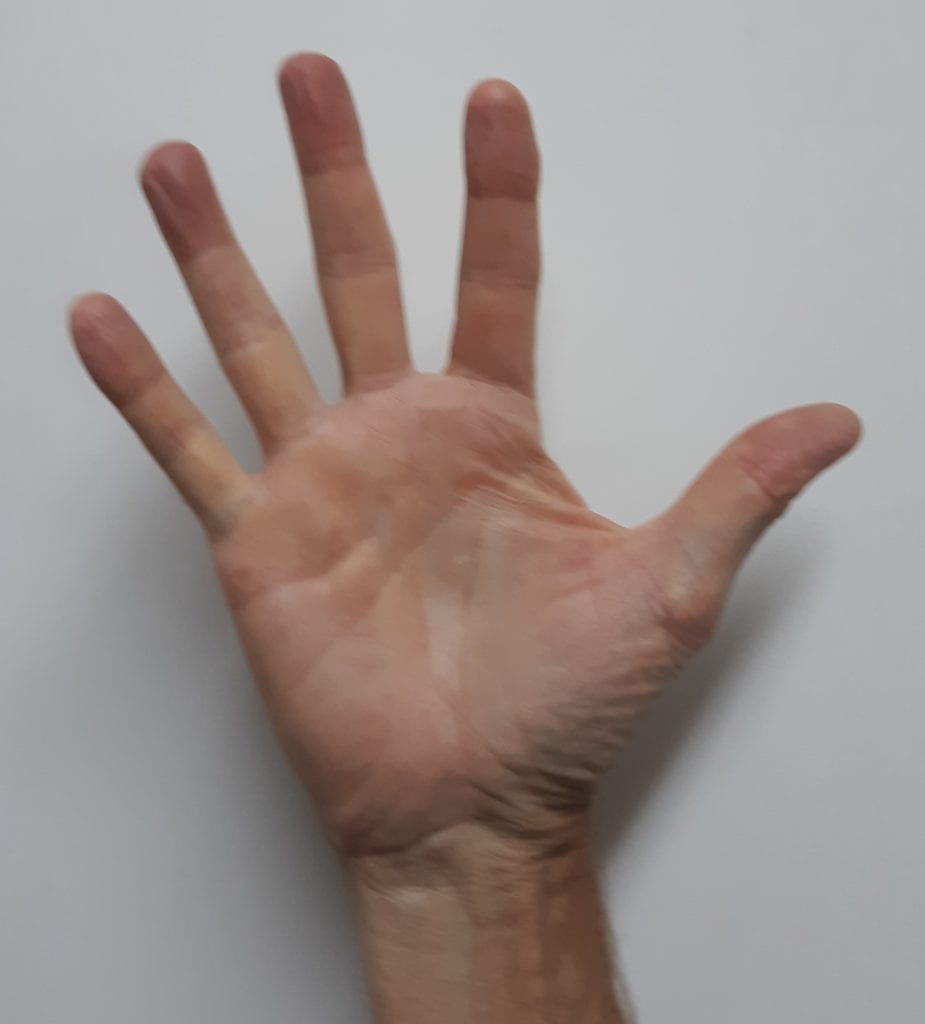
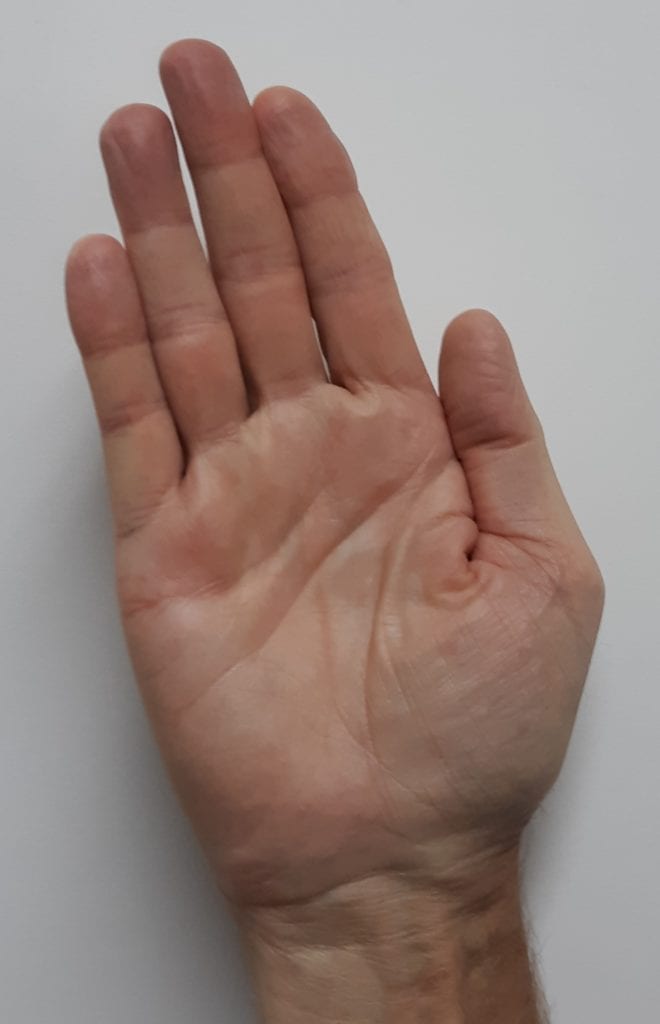
1. Whole Hand Finger Flexion/Extension Tendon Glides:
- Starting with knuckles/joints furthest from the palm, slowly make a fist
- Bend or flex the DIPs (Distal Interphalangeal joints) then the PIPs (Proximal Interphalangeal joints) until your fingers are curled into a fist
- Wrap your thumb around/across your fist
- Relax, then straighten your fingers and thumb out and spread them apart
- Pull the fingers and thumb back together
- Repeat for 1 to 5 repetitions
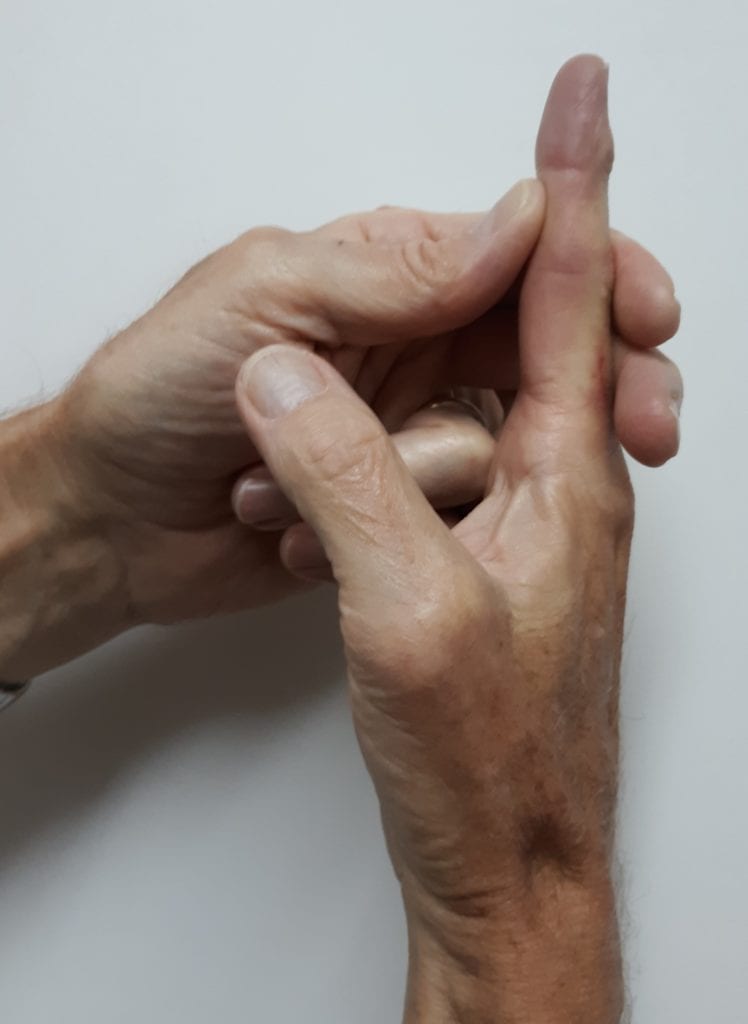
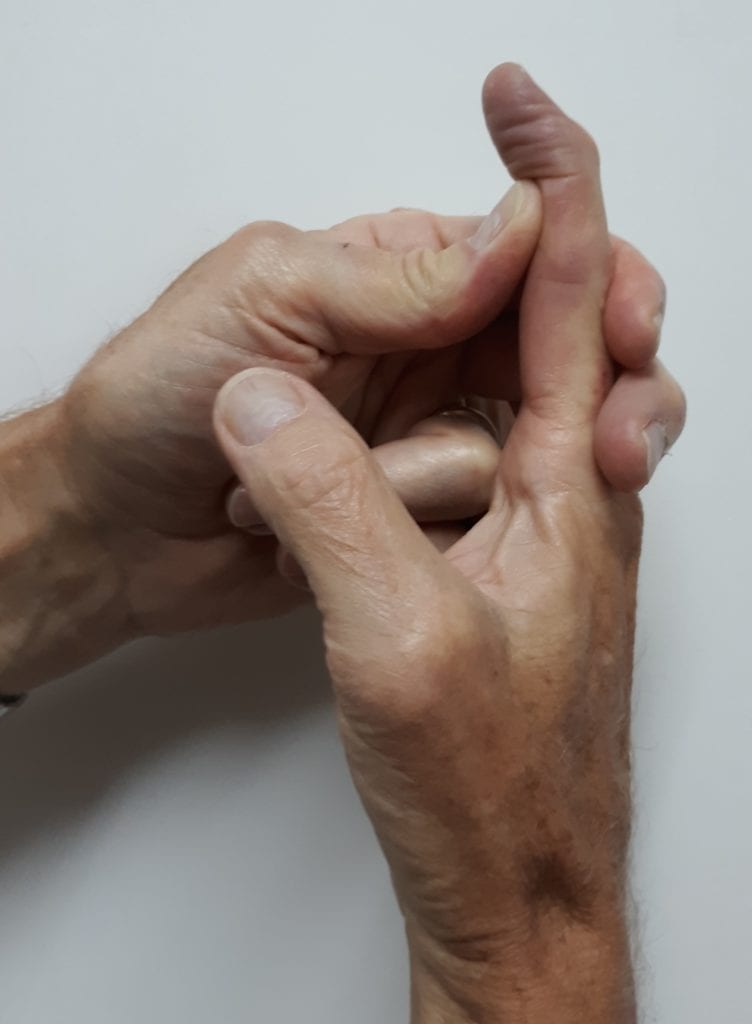
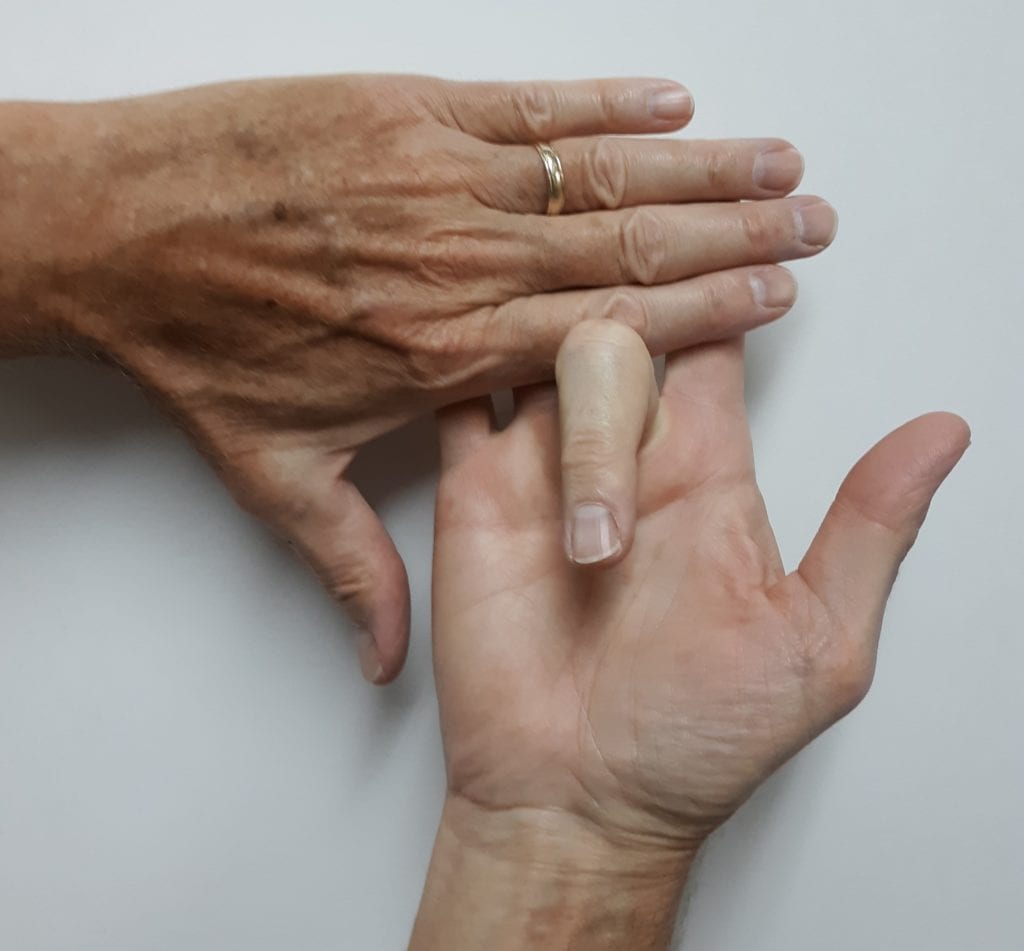
2. Active Individual DIP (Distal Interphalangeal joint) Flexion/Extension
- Using the fingers of the opposite hand, hold/pinch or block the middle knuckle (the PIP) to prevent it from bending
- Bend or flex the end knuckle (the DIP) as far as you can then straighten
- Repeat for 2 to 10 repetitions
This is an exercise I perform regularly when the osteoarthritis (Herberden’s node) in my right index finger DIP joint “acts up” after working on the computer keyboard and mouse clicking for too long.
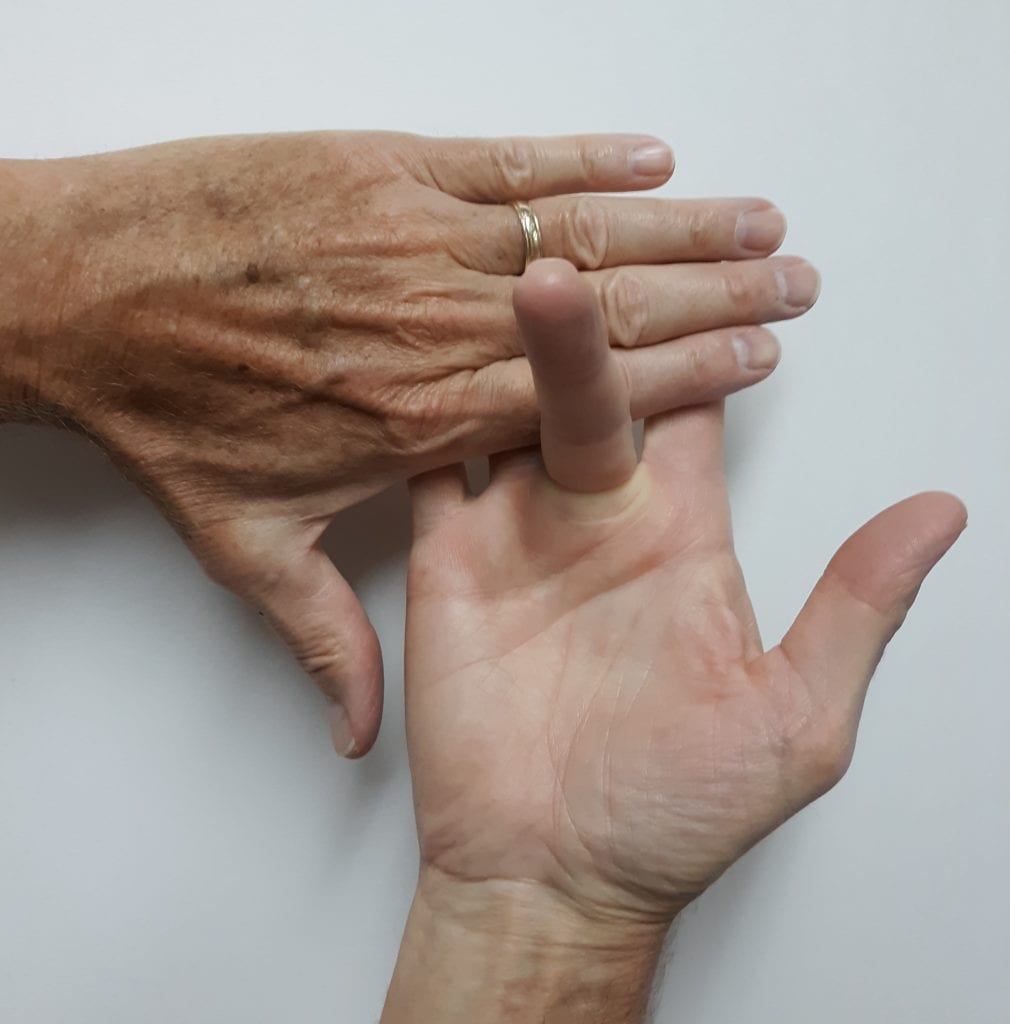
3. Individual Finger Flexion Tendon Glides
- With the elbow bent (about 90 degrees) and kept close to the trunk, palm up and wrist straight, use the opposite hand to hold or block all but one finger (e.g., to start with the middle finger, block/hold the index, ring and little fingers in place)
- Bend or flex the PIP through the MP (Metacarpophalangeal joint) as you bring the tip of the finger towards the palm
- Repeat for 2 to 10 repetitions; start slowly and only perform 1 or 2 repetitions if this is uncomfortable
- Complete with all fingers (e.g., middle finger, then index finger, then ring finger, then little finger; the order you use isn’t important)
If it is more difficult or painful to perform with one or more fingers, focus on these fingers throughout the day. For example, if you notice more stretching/pulling and discomfort when using the middle finger, complete one or two repetitions; then about 30 minutes later, complete another one or two repetitions with the middle finger only; repeat this as needed. If the flexor tendons and muscles for the middle finger are responding, it will become easier and you will be able to complete more repetitions by the end of the day. If, on the other hand, discomfort and other symptoms (e.g., numbness and tingling in your hand and pain in your forearm) are increasing, stop and consider the need to see a hand specialist and a referral for occupational or physical therapy.
Due to the architecture of the hand, the tips of the middle and ring fingers can typically bend much closer to the palm than the tips of the index or little fingers. This is normal. Don’t force fingers to bend/flex more than they comfortably can. Also, don’t be surprised if you notice pulling and discomfort in your forearm. This is where the flexor compartment muscle bellies are located.
I frequently recommended individual finger flexion and tendon glides for the index, middle and ring fingers, along with the “Carpal Tunnel Decompression Exercises” (covered next), wearing an appropriate wrist brace when sleeping and use of cold pack applications to assist clients who were diagnosed with carpal tunnel syndrome (CTS). This treatment proved beneficial both pre- and post-carpal tunnel decompression surgery, as well as for clients who chose not to have the surgery or those who needed to postpone surgery. It also helped to rule-out possible underlying causes of CTS; e.g., a body of research indicates that CTS is not caused by computer keyboarding and mouse use; however, CTS is associated with pinching and forceful gripping, as well as extreme wrist positions, especially if pinching, gripping and extreme wrist positions are prolonged or repetitive. There is also a genetic and gender component.
4. Carpal Tunnel Decompression Exercises – Median Nerve Stretching
- Hold each position for up to a count of 10
- Move from one position to the next in a slow, controlled, fluid manner.
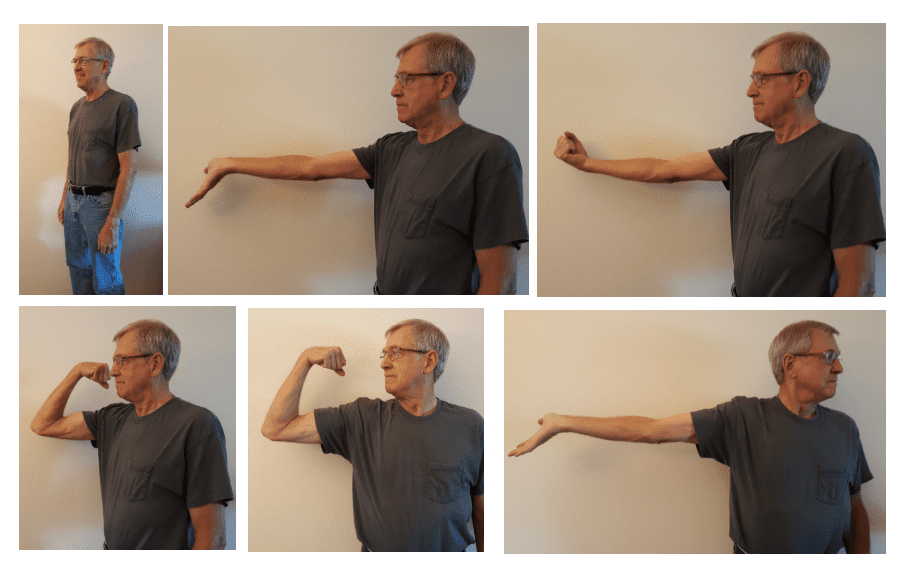
- Start by standing with your arms, wrists and hands relaxed at your side
- Lift your right arm out in front of you to about shoulder level (or slightly below) with your elbow straight (in an extended position) and the palm of your right hand facing up. Bend your wrist back (into wrist extension) with your fingers spread slightly and the fingertips pointing towards the floor and hold for up to a count of 10.
- While continuing to keep your elbow straight, bring your wrist up into a flexed position as you make a tight fist with your fingers and thumb and (again) hold for up to a count of 10 (i.e., your elbow is straight and your thumb and fist are trying to reach towards your face).
- Next, bend or flex your elbow while bringing your fist towards your right shoulder and keeping your wrist in a flexed position and tight fist; hold for up to 10 counts.
- While keeping it at shoulder level (or slightly below), rotate your arm out to your side; maintain your flexed elbow, flexed wrist and tight fist; then rotate your neck and turn your head so you are facing your fist (i.e., your nose is close to the back of your hand and knuckles); hold for a count of 10.
- Straighten your elbow and release your fist (straighten your fingers) and bend your wrist into the extended position with fingers again pointing towards the floor, then slowly rotate your neck and turn your head toward your left (opposite) shoulder; hold for up to 10 counts. (Note: This position puts the median nerve, which runs through the carpal tunnel, on a maximum stretch. It’s not unusual for people performing this step to initially only be able to tolerate it for a very short time – only for a count of 5 or 6. As they perform this series regularly, people typically find they can tolerate it for a count of 10 and their arm feels relaxed and re-invigorated afterwards.)
End by lowering your arm, turning your head forward, relaxing and gently shaking your hands. Repeat with your left arm. It’s also good to compare your right to your left; i.e., Is one side tighter? Do you experience numbness and tingling in one hand when you perform #6?
This series of movements was developed in 1996 by Dr. Houshang Seradge, an orthopedic surgery and hand specialist in Oklahoma City, OK. Dr. Seradge recommends performing a complete series consisting of 13 steps once before and once after your workday. He recommends performing Steps 1 through 6 (described above) during breaks. I started using this series shortly after I got an illustrated copy of them in 1996. I like them not only because of the benefit to the carpal tunnel and median nerve but because of the stretch and relief to the extensor and flexor compartments of the forearm (including the ulnar and radial nerves). I worked with many people who didn’t have CTS but they did have very tight forearms, and this series was particularly helpful. (In addition to other exercises and work station adjustments, this series was effective for people who had computer “Mouse-Shoulder syndrome.”) As previously listed, follow general guideline and precautions for stretching.
These are just some of the hand and wrist stretches that can benefit oil painters. Nerve glides (which I don’t cover in this post) can also be very beneficial. The key is finding a good variety of stretches and nerve glides that you find beneficial and performing them regularly. Check-in with Yourself!
Modalities:
In the rehab clinic, a variety of modalities are used such as ultrasound, electrical stimulation, phonophoresis, iontophoresis, TENS (transcutaneous electrical nerve stimulation), mechanical and manual traction, fluidotherapy, paraffin, moist heat packs, ice packs and contrast therapy (alternating between heat and cold).
Cold Packs, Hot Packs and Contrast Therapy:
I’m going to focus on cold packs, and contrast therapy, since these can easily be used at home as part of a self-care program as they don’t require any special equipment.
Benefits of Cold Therapy:
Cold or ice therapy is used to reduce blood flow (by narrowing blood vessels), reduce inflammation and pain signals. When used in conjunction with active range of motion exercises and stretching, cold therapy can help to decrease swelling (edema). It’s typically used during the acute or early phase of healing but may also be used as part of an ongoing treatment plan for more chronic conditions.
NOTE: Care must be taken to avoid cold packs that are too cold or are applied for too long as this can cause skin damage including severe burns. People with compromised skin, neurological and other conditions, should always consult their physician before using any modality. (For example, cold packs are not used with people diagnosed with Raynaud’s syndrome.)
Purchased gel cold packs can be kept in your refrigerator for use as needed or you can use a bag of frozen peas; both conform well. You can also make your own cold pack using one-part isopropyl rubbing alcohol combined with two-parts water (e.g., ¼ cup rubbing alcohol mixed with ½ cup water); place this solution in a zip-lock bag. Depending on the type and brand of bag you use, I recommend double bagging; i.e., place the sealed bag with the solution inside another zip-lock bag and seal this second bag. Put the double-bagged solution into your freezer, and you’ll end up with a cold slush that also conforms well. Typically for hands and wrists, and depending on cold tolerance, a cold pack is applied to the painful area for 15 – 20 minutes maximum. (After about 20 minutes, the cold pack has reacted to body heat and is no longer as cold or effective as it originally was.) A washcloth or other thin material can be placed between the cold pack and the skin. On applying, the typical phases when using a cold pack are: 1) feels really cold, 2) when you check under the cold pack, the skin appears mottled, 3) you experience a warming sensation, 4) then the area feels numb. Shortly after removing the cold pack, there is usually a flushing or re-bound reaction when the blood vessels re-open and blood flow resumes at its normal level. The skin should no longer look mottled, and you should say, “That feels better. I’m glad I used that cold pack.” (If you applied a cold pack properly, you should not see skin pallor, which indicates a circulation issue, or a dry patchy/rashy-looking spot, which could indicate a skin burn. Nor should you experience an increase in muscle tension and spasms, which may indicate that you shouldn’t use cold packs for this condition.)
I instructed clients to monitor their pain and swelling after applying cold packs. While initially skeptical, many determined that cold packs worked better for them than hot packs, and cold packs became their treatment of choice.
Benefits of Heat/Hot Therapy:
Both heat and cold have their uses in treating an injury. Heat therapy works in the opposite manner compared to cold therapy. Heat expands the blood vessels, which increases circulation. While this can relieve cramping, help with tight, aching muscles and decrease discomfort, it can also make inflammation worse.
Contrast Therapy – Alternating between Cold and Hot Therapy:
While both cold and heat can be beneficial, sometimes it’s difficult to decide which is best and sometimes one alone may not provide as much relief as alternating between the two, known as contrast therapy. Contrast therapy can reduce swelling and inflammation, improve circulation, decrease muscle tension, and ultimately reduce pain.
A typical ratio for contrast therapy is 1 minute of cold (using a cold pack) for every 3 to 4 minutes of heat (using a hot pack) repeated about 3 times. A basic pattern for applying contrast therapy is: begin with 1 minute of cold, apply 3 minutes of heat, apply 1 minute of cold, apply 3 minutes of heat, apply 1 minute of cold, apply 3 minutes of heat, and finish with 1 minute of cold.
The guidelines I gave clients at the rehab clinic varied slightly from this ratio:
- Prepare two pans or sinks of water (deep enough to be able to submerge hands and wrists)
- One pan/sink with water 105-110 degrees (comfortably warm but not hot)
- One pan/sink with water 59-68 degrees (cold)
- Immerse your hand(s) and wrist(s) in the warm water for 10 minutes
- Immerse your hand(s) and wrist(s) in the cold water for 1 minute
- Immerse your hand(s) and wrist(s) in the warm water for about 5 minutes
- Immerse your hand(s) and wrist(s) in the cold water for 1 minute
- Repeat 4 and 5 two times, then end in warm water for about 4 minutes or end with 1 minute of cold if you need to focus on reducing inflammation and swelling.
Clients could use conforming cold and hot packs if they preferred. Whether using packs or immersing in water, they were instructed to monitor their response and adjust accordingly.
Kinesio® Tape Technique:
Kinesiotaping is a rehabilitative taping technique developed by Dr. Kenzo Kase. I found it very beneficial for providing support and stability to muscles and joints without restricting range of motion, and for decreasing edema. Kinesiotaping along with other treatments, such as strengthening exercises and cold therapy, helped clients to meet their pain-reduction and rehab goals.
Below are photos of several taping patterns for hands and wrists. Where you anchor the tape and the amount of stretch applied through the tape is important. Since it is flexible and latex-free, most people tolerate kinesiotaping well and can wear the tape for days at-a-time. However, in my experience, due to hand use and washing, kinesiotape applied to fingers, thumbs, hands and wrists only stays on for a day at the most, and then needs to be re-applied.
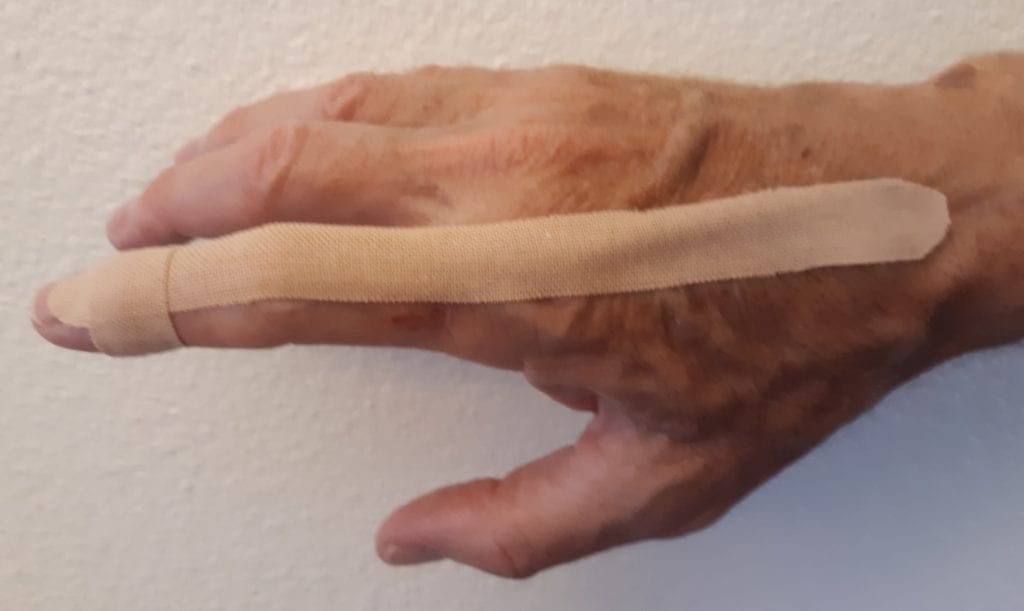
Index Finger Extensors 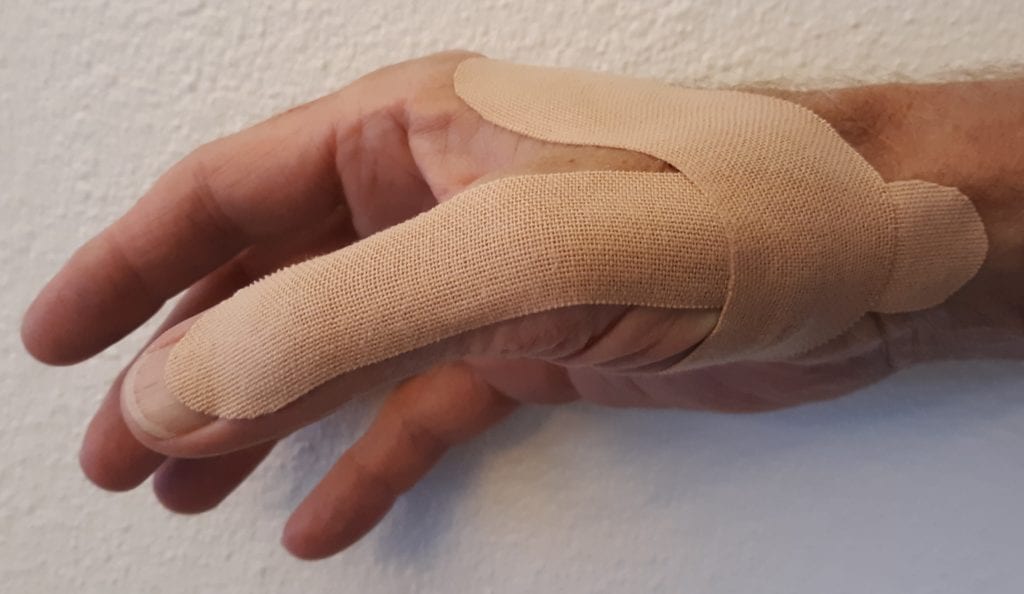
Thumb Carpometacarpal (CMC) joint 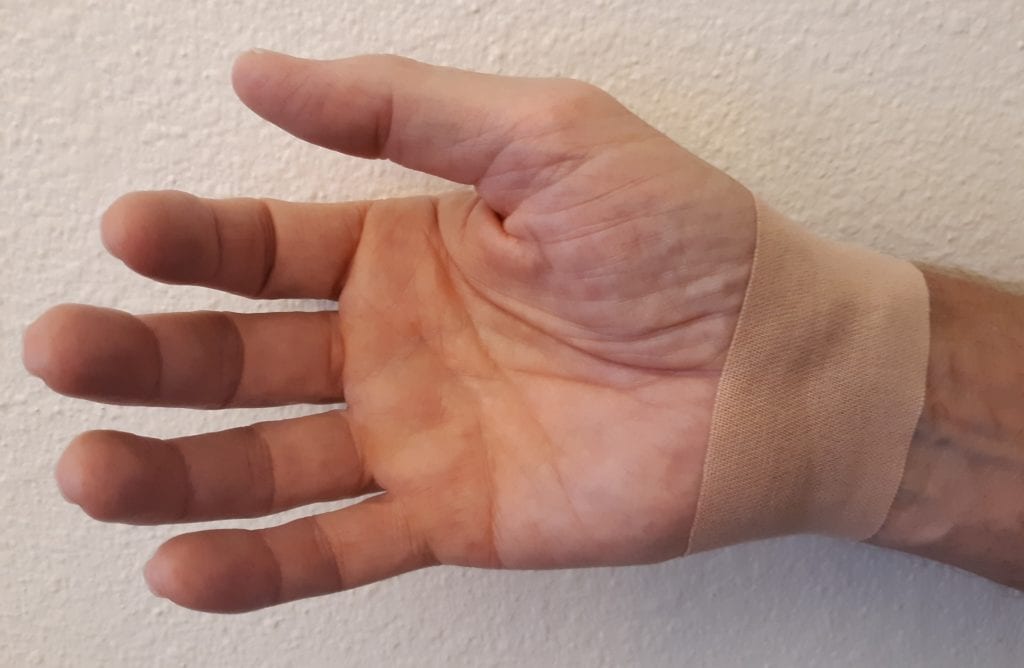
Wrist Carpal Tunnel (CT)
You can find more information on kinesiotaping by going to https://kinesiotaping.com or by talking to an occupational or physical therapist or other healthcare provider who is trained in kinesiotaping. There are also a number of reasonable YouTube videos.
Braces/Splints:
The last item I’m briefly mentioning is the use of braces or splints. A brace or splint can be beneficial if it fits well and provides the support required without rubbing (i.e., creating red spots). It can be problematic if it doesn’t fit well or you “fight” against it or you don’t perform stretches and exercises to maintain range of motion and strength on a regular basis in conjunction with wearing the brace or splint.
I like the Comfort Cool™ brand of braces because they are breathable, well-designed with good adjustability, and a good range of sizes. The Comfort Cool™ Thumb CMC Restriction Splint works well for people with thumb issues, and the longer Comfort Cool™ Thumb and Wrist Splint are good for people who need thumb support as well as maintain a neutral wrist position and/or need additional wrist support (e.g., people with lateral epicondylitis that is exacerbated by wrist extension). Comfort Cool™ splints are readily available through web sites. Similar braces and splints can also be found in pharmacies.
In Conclusion:
I’ll cover the elbow, shoulder, neck, upper back and visual system in future posts.
Remember to check-in and take good care of your fingers, thumbs, hands and wrists!
Enjoy a life-time of creativity and oil painting!
Margaret Blank says
I was directed to this article by a SAQA (Studio Art Quilt Associates) group; I’ve found it helpful and informative. Only recently have I had some discomfort in my right shoulder, arm and hand (I’m 70). As a needleworker, I discovered many behaviours that you highlighted that could be affecting my posture and causing this discomfort. Thank you for your very enlightening and helpful article. I am going to save it and refer back to it often!
Susan Kelly says
Very useful article. You mention some more to come. I would love to know how/where to find them.