• Skip to primary navigation
  • Skip to main content
  • Skip to footer
  • Login
  • Join OPA

OPA - Oil Painters of America

CREATING COMMUNITY ADVANCING SKILLS ELEVATING EXCELLENCE

  • About
    • Mission, Policies & Bylaws
    • Board of Directors
    • Presidential History
    • History
    • Staff
    • FAQ
  • Membership
    • Membership Information
    • Membership Directory
    • Contact Membership Department
  • Exhibitions
    • Rules and Policies
    • National Exhibition
    • Virtuosos of the OPA
    • National Salon
    • Award Winners
    • Summer Online Showcase
  • Programs
    • Lunch & Learn
    • The OPA Blog
    • Scholarships
    • Critiques
    • Have A HeART Humanitarian Award
    • Ship and Insure Info
  • Community
    • Events & Paint Outs
    • Directory
    • Workshops
    • Brushstrokes Newsletter
  • Shop
  • Sponsorship
    • Current Sponsors
    • Sponsorship Opportunities
    • Make a Donation
  • Show Search
Hide Search

Uncategorized

Frame Makeover

Barbara Schilling OPA · Aug 24, 2015 · 9 Comments

Refinish those old frames!!

“Cheap” looking metal leaf frame
Refinished warm antique black with soft handrubbed patina

As artists we all seem to accumulate those frames that we just don’t know what to do with. They may have gotten damaged shipping to a gallery or banged around transporting to a show. Maybe they were “ok” frames but the finish just wasn’t up to gallery standards or the color just won’t work with the art.
There are many ways to bring new life back to those old frames so they can come out of the closet and hang proudly on your best art!
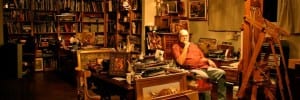
I have been a fine art restorer for over 35 years and have learned many tricks about refurbishing damaged frames that I would like to share. Most artists have the ability to refurbish their own frames but they lack the know-how. Being able to modify your own frames can not only save $1000’s of dollars, but it can even open a whole new opportunity to the artist to individualize and modify their frames to be one of a kind pieces that will enhance their art.
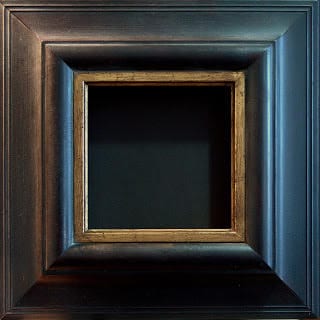
I am going to give a step-by-step for you on creating this lovely soft, handrubbed black finish, however, these same steps can be used to modify an existing finish or work with other base colors than just black…..have fun, get creative!
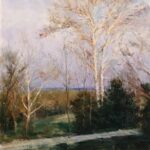
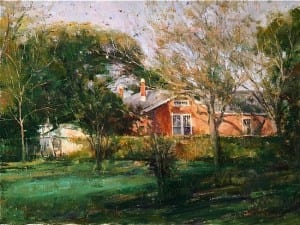
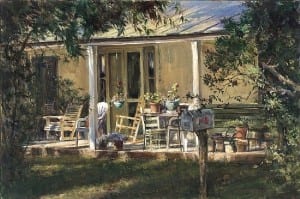
A friend and wonderful artist, Connie Kuhnle, has used some beautiful soft, greyed colors for her charming plein air landscapes. One of my favorites is her antiqued mustard/yellow on a white and yellow farmhouse…it is perfect!!
I often use antiquing and waxing to add some interest to a newly purchased frame that just doesn’t quite have the richness I am looking for. It is a fairly quick and simple step that can make a remarkable difference.
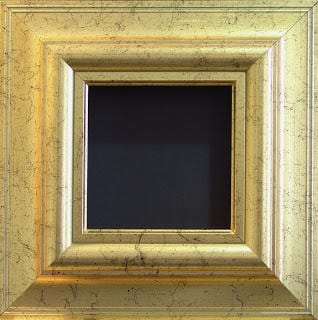
Frame Makeover

Supply list for warm black antique finish:

1. Black paint- I use semi gloss spray enamel, but any good quality black acrylic/enamel paint will work. You can use a brush-on altho you may find that you have some texture of the brush strokes in the finish. They may not be objectionable, depending on the finish you want.

2. Red paint- (optional)….same as the black. Used to create a red undertone.

3. Fine steel wool

4. Fine 280 grit sandpaper

5. Antiquing stain…..raw umber oil paint will work, as will acrylic. you can also purchase a stain like Minwax in a dark walnut color.

6. Rottenstone

7. Wax/polish for wood ( I like “Bison” Black ebony best)

8. Hammer with a claw side

9. Polyurethane wood finish, semigloss, brush or spray

If an antique white frame is desired you will need white paint in place of the black. This same finish works beautifully with a color as well.

  1. Lightly sand original finish to cut the gloss a bit and allow for better adhesion of the new paint.
  2. Pound the frame casually, bouncing the clawside of the hammer over the surface to create even (but not too uniform) scars and indentations if you want a more antique look.
  3. Spray (or brush on) with red paint (if red undertone is desired). (allow to dry as per instructions on the paint).
  4. Lightly steel wool
  5. Spray (or brush on) black enamel. (allow to dry)
  6. Use sandpaper on edges and across the surface to allow some red to show through and give a “worn” look to the finish. It is going to look best if you have fairly even streaking throughout the frame. If the streaking is not even the frame will look splotchy.
  7. Apply raw umber antiquing with a wide brush and wipe with a soft rag, paper towel, or cheesecloth to remove some but not all of the antiquing. Allow stain to remain in the crevices as well as the indentations that you made. Allow to dry.
  8. Spray or brush with polyurethane finish to seal. Allow to dry.
  9. Apply polishing wax and allow it to dry then buff to a nice handrubbed lustre.
  10. Dust lightly with rottenstone…especially in crevices and detailing of frame. Buff again.

While the steps may seem time consuming they really are not. It is important to give each of the finish layers time to dry so start to finish will take a couple of days but actual time working on the frame shouldn’t be more than an hour or two. With practice you will find it easier and easier to achieve the results you are after and start adding your own variations to create one of a kind finishes!
Barbara Schilling
Fine Art Impressionist Painter
www.barbaraschilling.com

John Austin Hanna Interview

Mr. John Pototschnik · Oct 28, 2013 · 4 Comments

John Austin Hanna
John Austin Hanna
Winner of the “Donors’ Award of Excellence” at the 2013 Oil Painters of America 22nd National Juried Exhibition, John Austin Hanna discusses his illustration background, his transition to a successful fine art career, and his current work.

Illustration as preparation for the fine arts

John Austin Hanna believes his 20-year commercial illustration career in New York and Dallas prepared him well for what has become a successful career in the fine arts. The Fredericksburg, TX artist enjoyed working with many types of professionals, included among them, Bill Neale, an important Dallas artist and art director who was “largely responsible for me going to New York. Illustration taught me to communicate ideas effectively. Even though those ideas weren’t always mine, decisions had to be made that communicated clearly and creatively those ideas. You really won’t make it if you can’t draw and have a good sense of design”, he said.

John Austin Hanna in his studio
Hanna and I were both illustrating in Dallas at the same time. Although I never met him at the time, I was a great asdmirer of his work…from a distance. He was recognized as one of the best in Dallas at the time, and stories I heard of his abilities always amazed me.
Transitioning from illustration to fine art was not that difficult for him. “The kind of painting I do is not that much different. The major difference though is not knowing if anything will sell. At least in illustration I got paid, most of the time, for everything I did.” Hanna seems to have a laid back, relaxed approach to his work. He paints anything and everything he is interested in, and does it well, with little concern whether his style will be unique…and yet, it is. Maybe this lack of concern, the variety of subject matter, and the large quantity of work he has produced has been a contributing factor.
Autumn Pond
“Autumn Pond” – 16″x 20″ – Oil
Cypress
“Cypress” – 16″x 12″ – Oil
Garden Spirit
“Garden Spirit” – 24″x 18″ – Oil

He doesn’t call himself a plein air painter but he does believe painting on location is important because it teaches us to see…to see what things really look like.

Selection of subject and working method

The ideas for his paintings come from things he has observed. “The subject pretty much selects me,” he says, “it’s something that just hits me.” When blocking in a painting, his method is loose and free. Normally, he dives right into a painting with very little preliminary work. He prefers to work out his ideas on the canvas during the block-in phase by moving elements around until he gets what he wants. He is not a slave to any set rules of composition. “I should spend more time attempting to simplify and minimize value masses, for I really admire those who do it well.” Even though he pretty much knows what the completed work will look like, he keeps an open mind, always willing to change direction if it will result in a better work. However, when asked how he knows when a painting is finished, he quipped, “When I’m halfway pleased.”

Old Green Door
“Old Green Door” – 36″x 24″ – Oil
Brick House on Bowie Street
“Brick House on Bowie Street” – 18″x 24″ – Oil

When working from photos he is aware of their distortion and lost details, but he also believes they have value in that they can help the artist to simplify. “The most difficult part of a painting for me is the middle…and putting enough paint on the palette. I do hope however, when all is said and done, that the end result will be paintings that stir feelings of personal importance in others.”

Porch
“Porch” – 24″x 36″ – Oil

Hanna’s paintings are not “pretty” pictures. They do not romanticize, sanitize, or glamorize the subject. There is a gritty reality to them. When walking through his fields you’ll need boots for you just know those fields could be full of stickers, cockleburs, and grasshoppers. Knock on the door of one of the old houses and you might very easily encounter a crusty old guy with a shotgun.

Art…an enriching experience

Getting Hanna to define art proved difficult. “It’s the age old question. It is what man has done since the beginning of time. A lot of fads come and go. What was considered illustration years ago is now bringing big bucks…as fine art. John Canaday’s book, ‘What is Art?’ is the last and only answer to the question. However, whatever its definition, it is an inexhaustible enrichment for life.” Whatever art is, it is a definite part of the Hanna family. His son and wife own a beautiful little gallery in Fredericksburg called the R.S. Hanna Gallery. They represent some very fine artists, including a nice selection of John Hanna’s work.

Bull's Eye
“Bull’s Eye” – 30″x 24″ – Oil
Missouri Pond
“Missouri Pond” – 16″x 20″ – Oil
Summer Cool
“Summer Cool” – 12″x 16″ – Oil (Donors’ Award of Excellence-OPA National)

When asked what advice he would give first-time collectors…”Buy original art; read about it, and go see it. Buy what you like; it’s a learning process” To become a successful artist there is only one way: practice, practice, practice, along with perseverance and a lot of luck. He also suggests the young artist/painter should “paint more, talk less; look at everything: galleries, museums, etc…and observe.” Asked which three artists have enriched his life and with whom he would like to spend the day…his answer: Richard Schmid, John Singer Sargent, and Joaquin Sorolla.
 

  • « Go to Previous Page
  • Page 1
  • Interim pages omitted …
  • Page 5
  • Page 6
  • Page 7

Footer

  • Join OPA
  • Contact
  • Donate

© 2026 OPA - Oil Painters of America · Design by Steck Insights Web Design Logo