Take Monet’s large water lily murals for example. There are photos showing these paintings being executed in his studio at Giverny. There are also photos in existence which he took of the water lily pond, and since the pond isn’t visible from the studio it’s likely that he used them as reference for the murals.
The American Impressionist, Theodore Robinson, left photos with grid marks on them which are used in transferring more accurately the photo to the canvas, and also left paintings which are almost exact replicas of the photos.
And in some of Corot’s later work figures appear which could only have been arrived at through the use of photographic reference. For instance, there is a horse and rider which appears in more than one of his later paintings. It is a small figure, but it is photographically accurate, even though the horse is in motion and could only have been in that pose for a fraction of a second. And we know both from his sketches and from his own admission that he could not capture such details in so limited a time working from the subject.
So, well-known artists have worked from different types of sources, but which is best?
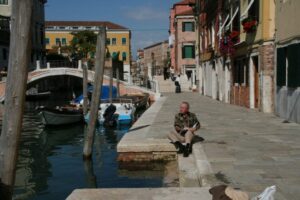
Working directly from the subject out-of-doors is called “plein air”. It is good practice, especially for beginners, because it forces you to work rapidly under less than favorable conditions, and this brings your instincts into play and causes you to learn more rapidly and to paint more spontaneously. It has the disadvantage of lighting which is always changing, bugs in your paint and comments from curious passersby. Most artists who paint this way solve the first problem by taking a photo early on which they later use in the studio to make corrections and apply finishing touches.
If you do want to use photos, here are some pointers: Use only your own photos. Photography is an art form and the photos you take represent your personal knowledge concerning what makes a good picture. Never use published professional photos. These were not your ideas, and in some places there are laws against their use. Don’t slavishly copy the photo. All good artists develop their own ideas about color, composition, etc., which they impose on the subject.
Technique
Paint From Life or Photos?

There are a host of good reasons to use photos:
- They’re convenient
- The light doesn’t change
- You can blow up small details
- You can be comfortable
- There are no bugs, wind, interrupting strangers etc.
- The model doesn’t move or get tired
There’s only one really good reason to work from life – it will make us much better artists.
Over time, we representational artists become skilled at rendering what we see. The problem is that even high-quality digital photos lie to us. Think of the four elements of a realistic painting: shapes (drawing or proportion), values, color temperature relationships, and edges. Three of the four are always wrong in a photo… and sometimes it’s all four.
The two or three darkest values turn into black and the lightest values become white (photographers call it “blowing out” the lights). The color temperature relationships are limited by the dyes used to make the prints or the phosphors in our computer screens. Also, the camera sees edges as equally sharp (not at all like the human eye which focuses on a sharp area in the center of our visual field surrounded by fuzzy shapes on the periphery).

When I critique portfolios at various art events I often see paintings where the shadows are black, the lights are white, all the edges are hard, and the light and the darks are the same temperature. I ask the artist, “you work mostly from photos, don’t you?” I often get the astonished reply, “how did you know?”
The pros work primarily from life: For one, it’s much easier to develop good edge control. Also, our sensitivity to nuance of color and temperature improves exponentially. We just can’t see those nuances in photos… I know; I’ve tried! Working from life, we learn to see the elusive, sparkling color in half tones. Our shadows start to have a sense of light and air in them instead of being dense, opaque blobs.
So, if you’ve decided to go the extra mile, how do you break free of the photo? The still life is easy. Just set it up and start painting. Likewise, there’s little excuse for trying to paint a landscape from a photo. If you’re nervous about going out alone, find a painting buddy or group. There are Plein Air groups in most areas now. OPA sponsors paint outs all over the country. Seek, and ye shall find.

Once we start to see the benefits in our work, we want more. The little bit of extra effort to paint from life, pays off tenfold.
Happy painting!
Make Preliminary Drawings The First Step In Your Portrait Process and Get the Painting Right the First Time
 Every portrait painting is the result of a series of steps. Some artists have fewer steps than others, and most artists are eager to grab their paints and dive right into the color process. But those who simply pose their model and start painting are taking a lot of chances, such as improperly placing the model on the canvas or discovering a more interesting pose once you’ve already begun. After many hours of your hard work and your model’s patient posing, you don’t want to wipe it all off and start over again.
That’s why preliminary drawings are such an effective portrait tool because they help solve problems before they happen. Drawings let you map out your subject and get acquainted with all the hidden things you’ll need to know about him or her. Take bone structure, for instance — every skull is similar, but there are always subtle variations that can make a big difference in the portrait. You must be as aware of the unseen side of your subject as you are of the visible side. If you’re guessing, the viewer will know it.
Use drawings to get to know your subject before you begin the actual portrait. For some artists this may take no more than a few sketches and suggested values.
 This kind of familiarity also pays off because with a live model, no matter how good a model he or she is, your subject is frequently changing. There are many muscles in the human head, more than in any other part of the body, and nearly all of them move when the expression changes on the subject’s face. If you can learn some thing about what muscles made the expression you want, then you can compensate for subtle changes (A smile, for instance, consists of much more than just upturned corners of the mouth.)
Put a little preparation into each portrait you do by starting off with preliminary drawings. You’ll soon find that a little investment up front can save you a lot of trouble later on, and it brings an important step closer to making your portraits the best they can be.
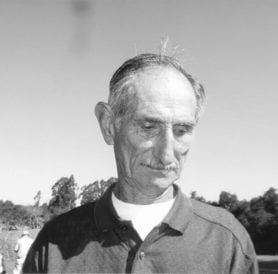
I have a good friend, Frank, who has wonderful bone structure. Every bone is right up front where I can see it. I snapped two photos of him, not pretty, smiley photos, but character studies. I wanted to show his bones and wrinkles off to their greatest advantage.
 Portrait Pointer: when you can’t find a model who is willing to sit for several hours, go for photography. Be ready with your camera when a great face comes your way. Just remember, don’t just copy the photo, study the bone structure and value patterns the same as you would when using a live model. Measuring is very necessary. Remember, every skull is different. Don’t generalize. Drawing is not only necessary to portraiture but a beautiful and fun form of art.
Uber Umbers and Other Colors from the Earth

People perhaps just hacked a chunk off the cave wall and started noodling, or charred a bone from last night’s dinner, or took a stick from the fire and began to make marks. The earth itself for thousands of centuries has created a harmonious palette of archival and readily available colors to create some of the most beautiful and enduring art in the world.

This topic has become a passion for me over the recent years, and I have experimented with most of the available historical pigments in one way or another, creating several in-depth projects that involve both artistic and cultural research. The most profound characteristics discovered are that these pigments are splendid to work with and endlessly beautiful.


To my eye, the modern cadmiums are so highly saturated they overpower my canvas and are difficult to handle on the palette. I find this true also of other modern colors such as phthalo greens and blues. Occasionally, when my mad-scientist self gets restless, I break out of this mold and experiment with some of the modern azo, turquoise, and quinacridones, but I usually will spend time muting or graying them down in some way.


It really is a process of elimination. I use just the colors that are safe after they are encased in oil and toss out the fugitive (many of the plant-based colors) or toxic colors. I use caution and strict hygiene habits while painting. Most importantly, the mere fact of having a few select colors on my palette to deal with allows easy and quick decision color mixtures.
More and more interest in hand-ground paints made from natural pigments is surfacing lately. I invite you to choose a few colors, (even if you do not grind the paint yourself, purchase the ready-made), and experiment. Do some studies and see the difference in the surface quality of your canvas. Make that connection between you the painter, the aesthetic of your art, and your materials. The results just might be profoundly gratifying.
How deep is your space?
At one of my always stimulating dinners with my late friend Zyg Jankowski, he said to me that the first decision a painter has to make about his work is a spacial one: how “deep” do you want to make the picture? John Carlson felt that every foot into nature counted; Ed Whiney had no interest in such realistic depth and recommended a student plan the composition on-site but walk around a corner to paint it. Over the years, I’ve been schizophrenic about the question. Under Emile Gruppe’s tutelage, I naturally followed Carlson’s path. Later, I experimented with a flatter approach , one which, carried to an extreme, can make the subject disappear in a series of flat planes.


Note: for a further discussion of these points, check out YouTube: