Lately, I’ve been experimenting with painting in oil on paper and unstretched canvas. These paintings are easier to travel with than panels or stretched canvas – you just stack them up like pancakes and interleave them with wax paper. But better yet, if you really love a piece, you can later mount it on board. Because the question of mounting has come up in my workshops, I thought I’d take a moment to describe my process.
By the way, it should go without saying, but I have to emphasize that the paper you use to paint on must be acid-free and archival. (I use etching or printmaking paper.) As a further safety step, seal the paper with PVA (Gamblin PVA or polyvinal acetate) before painting to prevent migration of linseed oil down into the paper. Best, however, would be to use canvas rather than paper. In the unlikely event you have to unmount a painting by reversing the glue, paper may be damaged in the process. Canvas should unmount without any problems.
Now, on to the process.
 Before painting, I draw a rectangle on my painting surface to indicate the boundary of the painting. (The sheet of paper or canvas is always cut at least an inch larger all the way around than what the mounted painting will be.) The rectangle helps with keeping the horizon level, which is very important in a landscape. This rectangle is the same size as the board I later will use for mounting. To create it, I just lay the board down on the surface and outline it with pencil. Although I may paint outside the line, I do make sure to keep my intended design wholly within the boundary.
Before starting the mounting process, I first check to make sure the painting is dry. Since I don’t use a lot of impasto, my paintings dry to the touch in a week or two. If I do have an area of thick paint, I press into it with my fingernail to see if it “gives.” I want to make sure it is solid enough to stand up to the pressure of a rubber brayer.
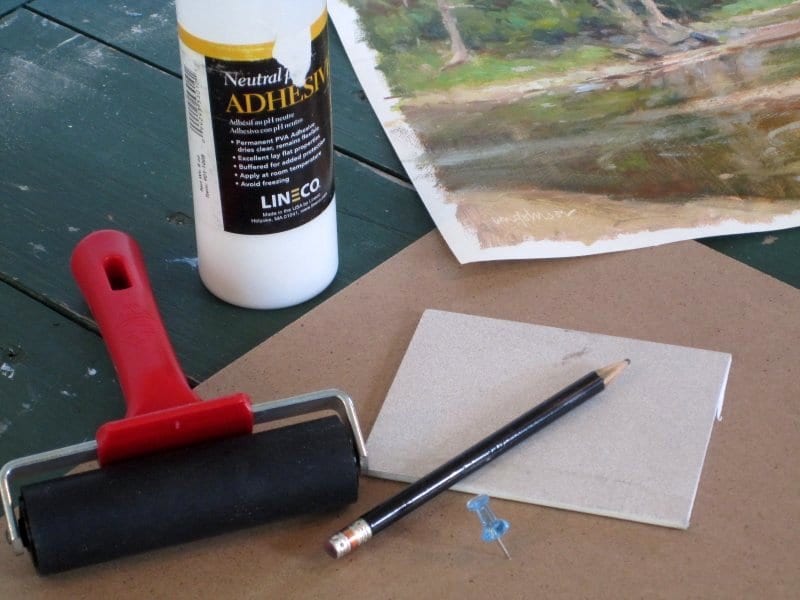
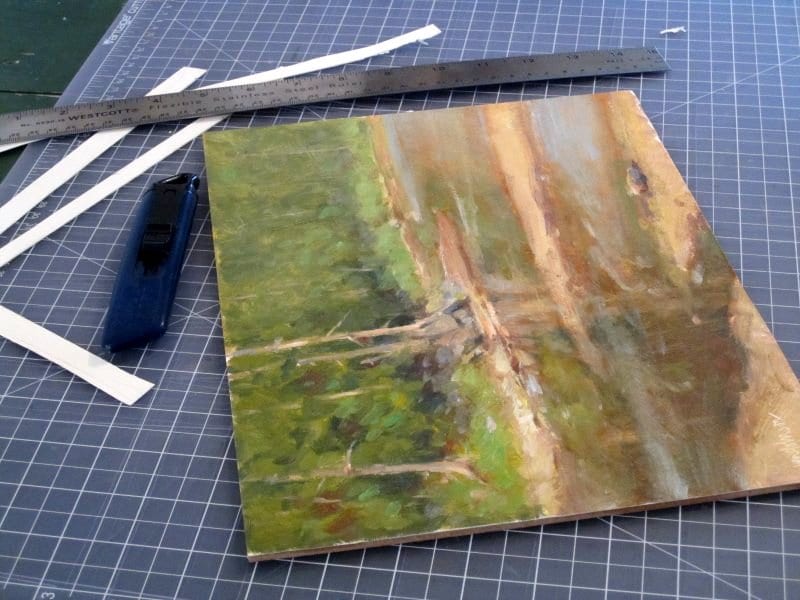
Next, I gather up my tools and materials. For mounting, I use untempered hardboard (sealed with PVA to prevent migration of acids and other chemicals up into the paper) and Lineco Neutral pH Adhesive. (The adhesive is reversible with water; another option is BEVA film, which is reversible with heat. See end of the article for details.) Additionally, I use a rubber brayer, a small square of 1/8″ hardboard, a pencil, a box cutter, a metal ruler and – here’s the key item – a pushpin.
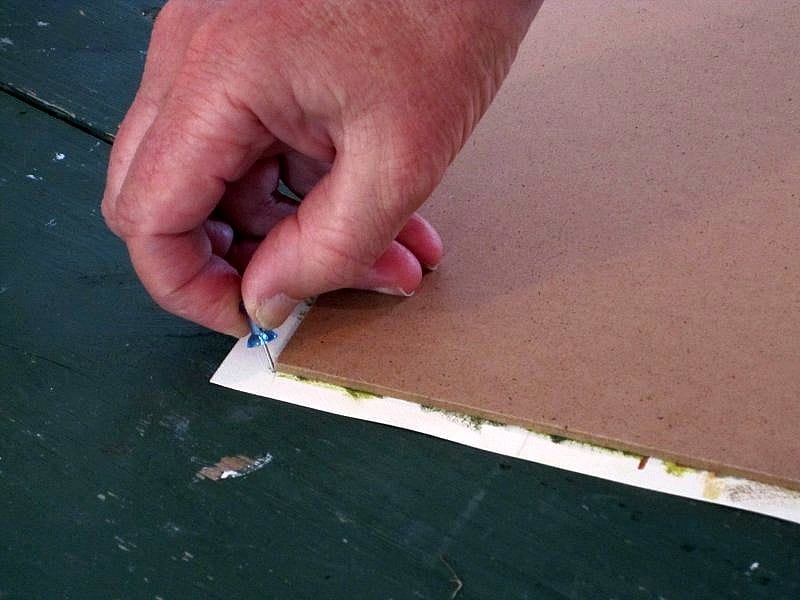
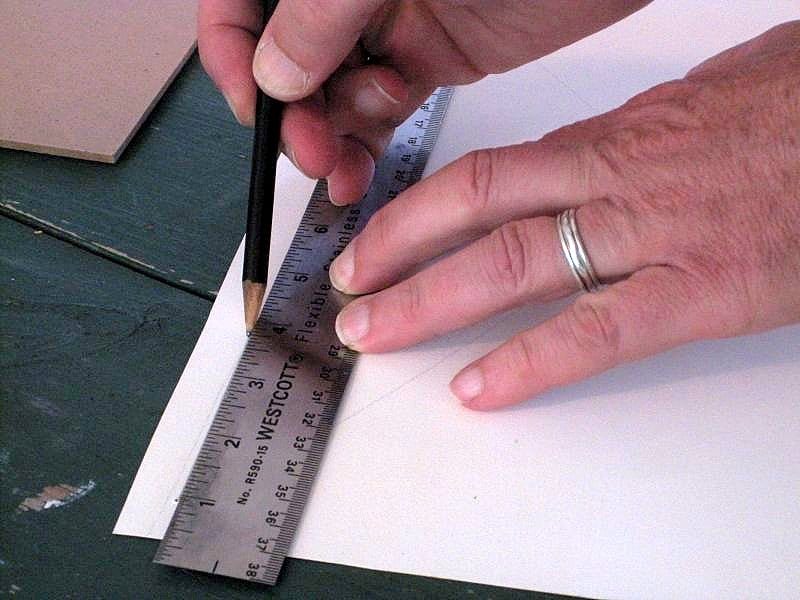
I lay the painting face-up. I position the board on it so it matches the pencilled board outline. Now, using the pushpin, I go to each of the board’s corners and make a pinprick in the paper or canvas. After removing the board and putting it aside, I flip the painting over, face-down. Looking carefully, I identify the pinpricks and, using a ruler and pencil, connect them into a rectangle. This creates a template for positioning the board exactly where it needs to go.
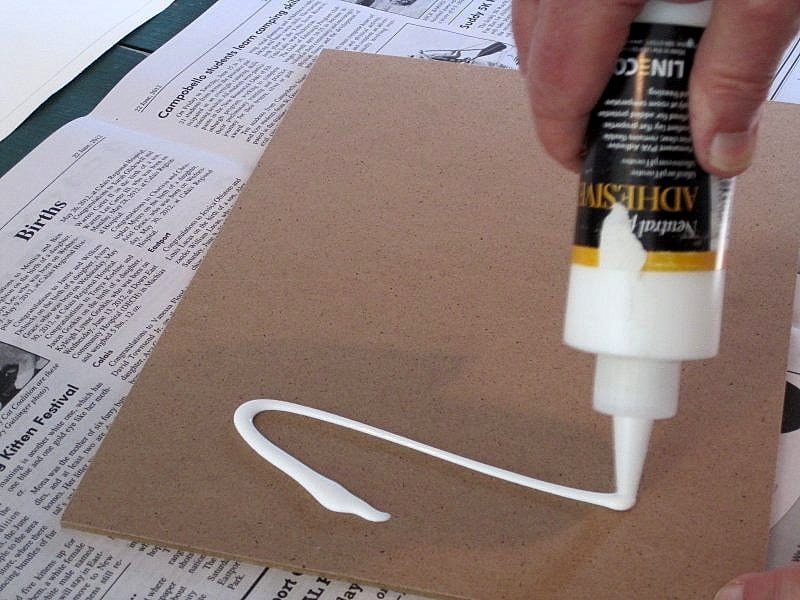
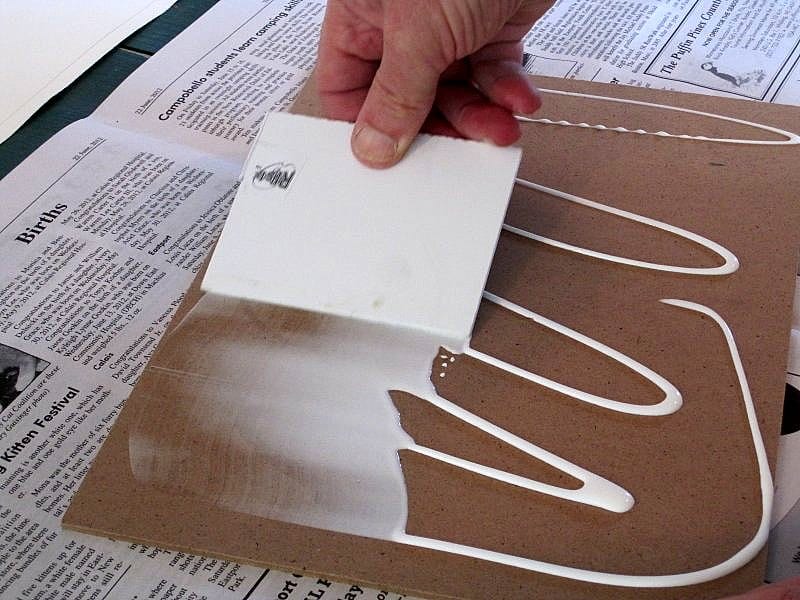
 Now, taking the board, I squeeze out enough adhesive for the job. (How much comes with experience.) I use the small square of 1/8″ hardboard to spread the adhesive evenly and all the way out to the edges. Flipping the board over so the glue side is down, I position it over the back of the painting, placing it within the pinpricks and their boundary. I press down lightly.
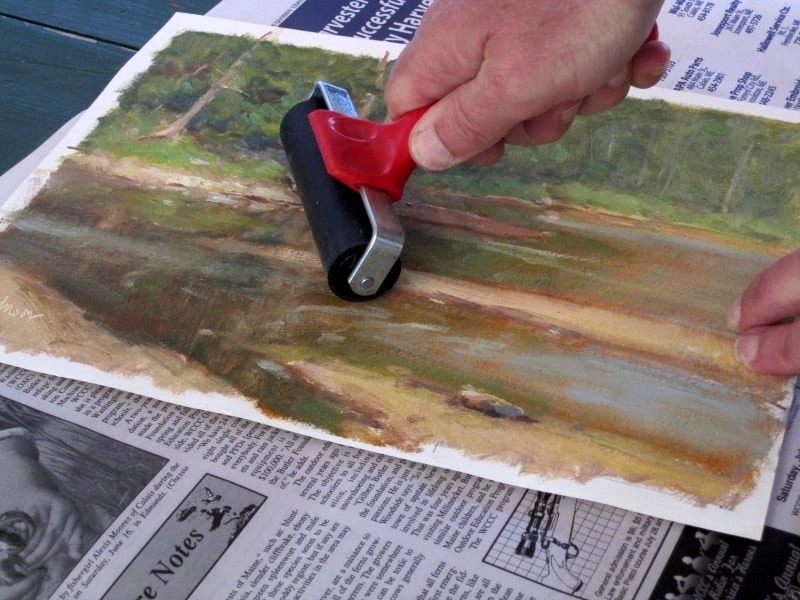
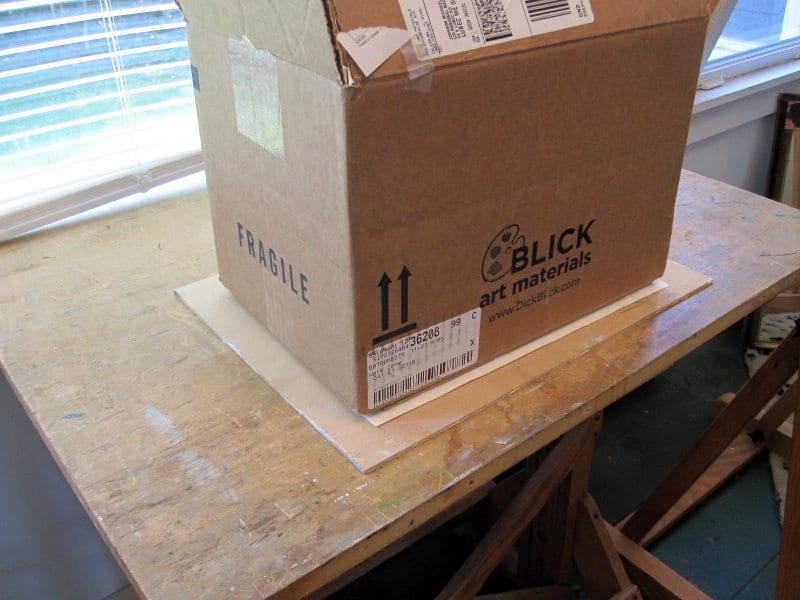 Ever so carefully, I turn over the painting and its now-attached board. This will place the painting face up. Using my brayer, I start at the center of the painting and roll out toward the edges. I press down pretty firmly to squeeze out bubbles and to flatten any warping. This is simpler than you think, especially if you are using etching paper, which is dimensionally stable and does not shrink or warp.
Once done, I flip the painting/board package over so the painting is face down. I make sure it’s on a clean surface so the paint side doesn’t pick up any dirt. Using a paper towel, I clean up any extra glue around the board’s edge. Some always oozes out in the braying step. Finally, I place a heavy weight on the assembly – a box of panels is perfect for this – and let it dry overnight.
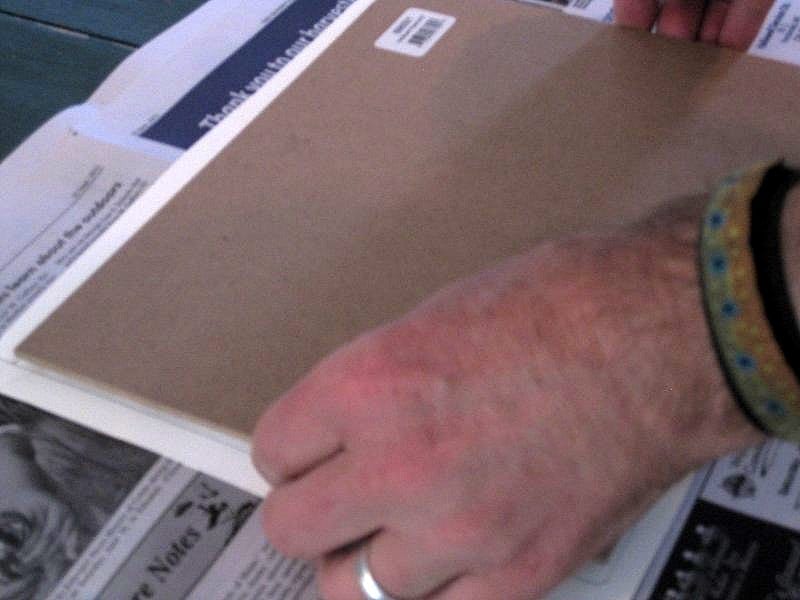
The following morning, I keep the painting with the paint side down and, using a box cutter and steel ruler, carefully cut away the excess paper or canvas. Any “burrs” created on the paper’s edge by the box cutter can be lightly sanded away with a sanding block. Sometimes I fail to get the glue all the way to the edge, and the paper may separate a bit from the board. I just squirt in a little extra glue and press down.

By painting on loose paper or unstretched canvas, I haven’t invested a lot of money in my surface. All things being equal, I’ve found paper to be a third the cost of my homemade gessoed panels. If I hate the piece, I can toss it out without guilt. But if I love it, I can mount it and frame it for a very professional look.
Earlier, I mentioned BEVA film as an alternative to mounting. This is product used by fine art conservators. The process is very similar, except that BEVA film uses heat for mounting. I use a household clothes iron set to its lowest setting (150 degrees) for activating the film. I purchase the film from www.conservationsupportsystems.com.
Visit Michael Chesley Johnson’s website to learn more about this author.
www.MichaelChesleyJohnson.com
K Meadows says
Thank you for taking the time to post this. I have often wondered the proper way to mount canvas to board!
ANTHONY DENNIS CAETANO says
thank you for your big bundle of tips and thank you for taking your time to help a begiinner like me. Im a retire, almost 90. californi judge.So really, im a beginner here.
thank you again. ill be looking for you. my email is DENNISCAETON@GMAIL.COM,
THE BEST TO YOU
D
Teresa Robinson says
Thank you for the tutorial. Some art exhibits require that the entry be mounted and ready to hang to museum standards. What are the standards for a hardboard painting? I can’t find it explained anywhere.
Diane Scarcella says
Such helpful information.
Thank you.
Karen Brodsky says
Spot on. Just what I needed to know. Thank you, thank you!
Canvas Golf Prints says
Your blog is an absolute treasure trove for artists like me! Your detailed instructions on mounting finished paintings are incredibly informative and have been such a lifesaver. Thank you for sharing your expertise and making the process so much more accessible.
Daniel Dantas says
This post really sparked new thoughts for me.