Several months ago, my husband and I moved from Dallas, TX, to Denver, CO. While we moved primarily for family, I was well aware that this “new life” meant leaving the comfort of my established art network, and seeking out a new community here in Denver.
As a natural introvert, that thought was rather scary.
But we all need community, and I mean, the kind where you get together in real life and draw from a model, or visit a museum show together, or grab coffee and talk about Sargent.
I worked really hard to build community in Dallas. When we first moved there I was a 23-year-old newlywed who had little to show for her art except for a few paintings completed during college (which I now cringe at whenever I see them in my computer’s “archived” folder). But my overwhelming desire to be great at painting won out over my fear of rejection. It took a lot of energy and determination to put myself out there and make new friends. I was brand new to the art scene, and incredibly insecure about my work. But I had a tremendous work ethic, and I knew that without a community of fellow artists, my growth would be slow. I also knew that other artists wouldn’t magically come to me… I would have to seek them out, draw them out of the woodwork, get to know them, and earn their respect.
During that time, I felt the need to attend as many workshops as possible with some of the artists I admired most. I made the mistake–after spending only a day or two with some of them–of asking them later if they would be willing to work with me privately, as if I were more special or talented than all the rest. Surely they would pluck me from the masses of clamoring students and take me into their fold! (I never heard back from them.) There was even one person I asked outright if she would mentor me, to which she replied rather awkwardly, “Uh, sure!” I knew in that instant that I had overstepped my bounds before a true connection had been made, and that by using the word “mentor” I had inadvertently stunted the natural development of what could have been a great relationship.
Sometimes the greatest, most influential mentors are the ones we have taken for granted. I went to a small liberal arts college, where I majored in art. That school had one painting professor, Sam Knecht. Not only was he my academic adviser, but he was my mentor and friend, and I learned more from him than just about anyone. I took him for granted because he wasn’t “famous,” but it was silly and immature of me to do so. The things he taught me were invaluable. Later, when I lived in Dallas, I was referred to a life drawing group called “The Society of Figurative Arts,” led by Michael Mentler. I started attending every week, and Michael, who was probably taken aback by this tenacious blonde girl—just had to get used to me being there. He didn’t always formally teach, but he would make little comments in passing—about form, line, proportion, etc.—that somehow sent me leagues forward in my understanding. Another mentor I took for granted: my husband Steve. He is not an artist, but he is a true go-getter who doesn’t waste time second guessing himself. I learned a lot about the business and marketing side of art from him.
As I grew in skill and confidence, I started realizing that community wasn’t just about showing up and learning from others. At some point, it was time to give back. I became the “Texas State Ambassador” for the Portrait Society of America. It was a completely voluntary position that involved hosting demos and get-togethers and relaying information about art related events. I was basically a messenger, but the benefits were huge. I got to know so many of the artists in Texas (which is gigantic state!!), that I felt incredibly connected. It was also a joy to be helping others.
So now that I’m in Denver, I’ve been even more proactive than I was when I lived in Dallas. I have attended gallery events, started going to open studios at the Art Students League, and traveled to plein air events just to meet the artists. Only three months after our move, I am finding community, because I was looking for it.
Here are my tips on building community and finding mentors:
- Seek out life drawing or plein air groups to attend, and attend them regularly.
- Attend workshops and conferences; get to know not just the instructor but fellow attendees as well.
- Allow relationships to develop naturally. Don’t push it, especially with artists who are well-known and already have hundreds of other students vying for their attention. Don’t be annoying.
- Learn to ask insightful questions – ones that dig deeper and spark passion in the response. Don’t be that person who just asks, “What color did you use?”
- Ask for honest critiques of your work, and accept criticism graciously.
- Don’t be afraid to ask! (Disclaimer: Many artists make their living by teaching. If you want to learn, be willing to pay them for their time and expertise.)
- Thank someone when they correct you.
- Don’t complain publicly.
- Accept compliments. Don’t put yourself down.
- Be confident even when you don’t feel it.
- Offer ideas.
- Reach out to other artists for studio visits, and allow them to do the same with you.
- Be kind; show empathy for others. Don’t be arrogant.
- Share your knowledge, even when you don’t think you have anything worth sharing.
- Remember that you get as much as you give. This applies not just to your art but to every aspect of your life.

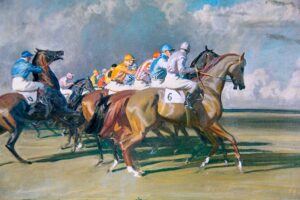
 Dance is a great opportunity to develop this skill. It is repetitious and (if you learn the choreography) it is predictable. I was led to an appreciation of dance, as subject matter, by a friend of mine––a horsewoman.
 In painting dancers the challenge comes in not only depicting movement, but that movement occurring under challenging lighting. As with horses, you can’t just aim a camera, take a few (hundred) shots, and head back to your studio. You have to understand what you see to depict it accurately.