• Skip to primary navigation
  • Skip to main content
  • Skip to footer
  • Help Desk
  • My Account

OPA - Oil Painters of America

Dedicated to the preservation of representational art

  • Home
  • About
    • Mission, Policies & Bylaws
    • Board of Directors
    • Presidential History
    • Frequently Asked Questions
    • History
    • OPA Staff
    • Contact Us
  • Membership Services
    • Member Login
    • Membership Information
    • State & Province Distribution For Regionals
    • Update Member Information
    • Membership Directory
    • Contact Membership Department
  • Events
    • Exhibitions
    • Online Showcase
    • Lunch and Learn
    • Virtual Museum Road Trip
    • Paint Outs
  • Resources
    • Brushstrokes Newsletters
    • Ship and Insure Info
    • Lunch & Learn Video Archives
    • Museum Road Trip Video Archives
  • Services
    • Sponsorship Opportunities
    • Scholarships
    • Critique Services
    • Workshops
    • Have A HeART Humanitarian Award
  • Online Store
  • Awardees
  • Blog
    • OPA Guest Bloggers
    • Blogger’s Agreement (PDF)
    • Comment Policy
    • Advertisement Opportunities
  • Show Search
Hide Search

Oil Painting

Keep It Simple! Using a Limited Palette

Kathleen Dunphy OPA · Sep 10, 2012 · 26 Comments

"Garapatta Spring" by Kathleen Dunphy OPA 24x18
“Garapatta Spring” by Kathleen Dunphy OPA 24×18

When I first started painting, I’d walk into art supply stores and spend hours looking at all the different pigments and brands of oil paints available, and drool over all those luscious colors: aureolin yellow, cinnabar green, quinocradone rose (just the names alone made me buy them).  I’d load up my basket with dozens of tubes of paint and head home thinking that at last I had found the color that would make me a better painter. Age and experience are wonderful teachers, and I finally came to the conclusion that no special pigment would be the key to my success. In fact, the more choices I had on my palette, the gaudier and less-realistic my paintings looked.
In 2003, I had the good fortune to study with Scott Christensen, who at the time was using a very limited palette that he had his students use in his workshops. At first, I was baffled: how could I get a true yellow ochre using only 3 primaries and a couple of grays? How could I get a wide variety of greens when there were no green tube pigments on my palette? But after sticking with this limited palette for a while and experimenting with these colors, I came to see that I could mix just about every color in nature using only 6 tubes of paint. Using this palette also helped me to see and understand color temperature better by simplifying my choices: if the color needed to be warmer, I added yellow; for cooler, I added blue. And I found that the colors I was mixing were so much closer to the reality I was seeing than when I used a broader palette. When there are 20 choices on the palette, I find it’s much easier to just say “oh, that’s close enough” and dip into a color straight out of the tube , but when I have to mix my colors from the primaries, I get a more accurate representation of my subject matter. Of course, there are certain local colors that I can’t duplicate exactly with this palette, especially if I’m painting man-made objects. But I can always get the correct value and the correct temperature, and when those are right, the color reads correctly.
"Tahoe Bliss" by Kathleen Dunphy OPA
“Tahoe Bliss” by Kathleen Dunphy OPA

For example, the color of the water at Lake Tahoe is an incredibly intense blue-green. I may not be able to get that exact local color, but I can mix the right temperature and value, then surround that color with more muted grays and the color of the water will feel more intense and believable.
Over time, I experimented with adding and subtracting pigments from my palette and settled on the selection of paints that I’ve been using since about 2005. This is the palette that I use for all of my paintings, both plein air and in the studio:
Titanium White (any brand)
Cadmium Yellow Lemon (Utrecht)
Permanent Red Medium (Rembrandt)
Ultramarine Blue (any brand)
Naples Yellow Deep (Rembrandt)
Cold Gray (Rembrandt)
(Please note that the brands of the paints are very important as colors vary widely between manufacturers)
 
Although I use a limited palette for my paintings, I always start out by mixing puddles of several colors before I start the actual painting. Doing this accomplishes two things: it helps me to slow down and analyze the color before I dive headlong into painting, and it allows me to have an expanded choice of colors when I begin to paint.  I always mix the secondary colors (orange, green, and violet) regardless of what I’m painting, and the rest of the puddles of color are close approximations to what I’m seeing in the subject matter. Pre-mixing takes some time at the beginning of the painting, but it really saves time once I start to paint: I already have so many colors figured out and can concentrate on the subtle shifts in temperature and value that I’m seeing. Also, I don’t break the rhythm of painting to drop my brush, get out my palette knife and mix new color.
Here’s a shot of my palette before I start a painting:
Dunphy-Starting-Palatte
And here’s the finished painting from that palette:
"The Italian Store" by Kathleen Dunphy OPA 12x12
“The Italian Store” by Kathleen Dunphy OPA 12×12

There are certainly countless artists out there who use extensive palettes and get beautiful results, and my selection of pigments is just one way to approach painting. But if you have never used a limited palette, give this a try- you might be surprised with the results and be able to bypass all those rows of paint next time you’re in the art store.

Some Thoughts On Plein Air And Photos

Mr. Charles Cox · Sep 3, 2012 · 5 Comments

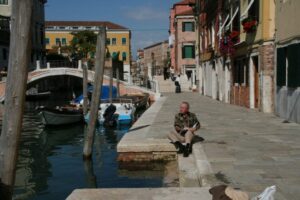
Charles Cox OPA Sketching in Venice
The photo shows me sketching in the Dorsoduro section of Venice. In my time I have sketched and painted from the subject, from imagination, and from photos. There are advantages and disadvantages to each. If you are interested in very accurate realism, then working from imagination is probably not a good option. There have been artists who had the ability to work realistically from imagination up to a point, but even Michelangelo, Velasquez, Titian and Rembrandt worked from models. And with the invention of photography, many artists, including more well-known artists than you might suppose, used photographs as aids.
Take Monet’s large water lily murals for example. There are photos showing these paintings being executed in his studio at Giverny. There are also photos in existence which he took of the water lily pond, and since the pond isn’t visible from the studio it’s likely that he used them as reference for the murals.
The American Impressionist, Theodore Robinson, left photos with grid marks on them which are used in transferring more accurately the photo to the canvas, and also left paintings which are almost exact replicas of the photos.
And in some of Corot’s later work figures appear which could only have been arrived at through the use of photographic reference. For instance, there is a horse and rider which appears in more than one of his later paintings. It is a small figure, but it is photographically accurate, even though the horse is in motion and could only have been in that pose for a fraction of a second. And we know both from his sketches and from his own admission that he could not capture such details in so limited a time working from the subject.
So, well-known artists have worked from different types of sources, but which is best?
Working directly from the subject out-of-doors is called “plein air”. It is good practice, especially for beginners, because it forces you to work rapidly under less than favorable conditions, and this brings your instincts into play and causes you to learn more rapidly and to paint more spontaneously. It has the disadvantage of lighting which is always changing, bugs in your paint and comments from curious passersby. Most artists who paint this way solve the first problem by taking a photo early on which they later use in the studio to make corrections and apply finishing touches.
If you do want to use photos, here are some pointers: Use only your own photos. Photography is an art form and the photos you take represent your personal knowledge concerning what makes a good picture. Never use published professional photos. These were not your ideas, and in some places there are laws against their use. Don’t slavishly copy the photo. All good artists develop their own ideas about color, composition, etc., which they impose on the subject.

Paint From Life or Photos?

William Schneider · Aug 27, 2012 · 12 Comments

"Alone In Warsaw" by William Schneider OPA
“Alone In Warsaw” by William Schneider OPA
Especially since the advent of good, inexpensive digital cameras, the debate about whether to use photo references has become almost sectarian. Purists admonish us to paint “only from life.” Yet the instructional art magazines regularly feature artists whose methods start and end with a photo reference. Certain subjects (squirmy kids, transient light effects, horses in motion etc.) almost demand photographs. Even great masters like Fechin and Zorn clearly used photo references for some of their paintings.
There are a host of good reasons to use photos:

  • They’re convenient
  • The light doesn’t change
  • You can blow up small details
  • You can be comfortable
  • There are no bugs, wind, interrupting strangers etc.
  • The model doesn’t move or get tired

There’s only one really good reason to work from life – it will make us much better artists.
Over time, we representational artists become skilled at rendering what we see. The problem is that even high-quality digital photos lie to us. Think of the four elements of a realistic painting: shapes (drawing or proportion), values, color temperature relationships, and edges. Three of the four are always wrong in a photo… and sometimes it’s all four.
The two or three darkest values turn into black and the lightest values become white (photographers call it “blowing out” the lights). The color temperature relationships are limited by the dyes used to make the prints or the phosphors in our computer screens. Also, the camera sees edges as equally sharp (not at all like the human eye which focuses on a sharp area in the center of our visual field surrounded by fuzzy shapes on the periphery).

"Platinum" by William Schneider
“Platinum” by William Schneider
Even the shapes may not be accurate. If you photograph a person six feet away, you will probably get an image of a normal-size face but legs and feet that appear tiny. In other words, the foreshortening distorts the proportions. So, if we work exclusively from photos, we become extremely proficient at painting subjects that don’t look real. We don’t even notice the errors.
When I critique portfolios at various art events I often see paintings where the shadows are black, the lights are white, all the edges are hard, and the light and the darks are the same temperature. I ask the artist, “you work mostly from photos, don’t you?”  I often get the astonished reply, “how did you know?”
The pros work primarily from life: For one, it’s much easier to develop good edge control. Also, our sensitivity to nuance of color and temperature improves exponentially. We just can’t see those nuances in photos… I know; I’ve tried! Working from life, we learn to see the elusive, sparkling color in half tones. Our shadows start to have a sense of light and air in them instead of being dense, opaque blobs.
So, if you’ve decided to go the extra mile, how do you break free of the photo? The still life is easy. Just set it up and start painting. Likewise, there’s little excuse for trying to paint a landscape from a photo. If you’re nervous about going out alone, find a painting buddy or group. There are Plein Air groups in most areas now.  OPA sponsors paint outs all over the country.  Seek, and ye shall find.
"The Mercenary" by William Schneider OPA
“The Mercenary” by William Schneider OPA
It’s a little more challenging to find place to paint the live model but a little digging will yield results. Local colleges or art centers may sponsor open studios. I paint with a number of groups in my area. In fact, I started hosting a group in my studio. We all chip in to pay the model. If you can’t find a group, start one. Finding models is relatively easy. Most people are flattered if you ask them to sit for you. There are even model websites.
Once we start to see the benefits in our work, we want more. The little bit of extra effort to paint from life, pays off tenfold.
Happy painting!
 

Inspiration And Motivation: The Prelude To Success

Bill Davidson · Aug 20, 2012 · 11 Comments

"Coastal Concert" 16x16 by Bill Davidson OPA
“Coastal Concert” 16×16 by Bill Davidson OPA
One of the greatest joys of painting is my artist friends and the beauty we are privileged to see and create. We all must struggle some but the difference is that successful painters find a way of keeping motivation ahead of the meaningful struggle.
We all want to achieve at a very high level and create the next great piece of art. Recent psychological studies have determined happier people are generally more successful.

“Happiness is the meaning and purpose of life, the whole aim and end of human existence” -Aristotle

It bears to reason that we all will paint more often and better if we are inspired, motivated and happy.
My favorite two questions for my workshop artists are:

  1. What do you love to paint? And
  2. How would you love for your paintings to look?

I am fortunate to get to teach pleasant artists in my workshops, thanks to all of you. Over the years it has become obvious the number one reason for people not achieving better paintings faster or even painting at their very best is they get discouraged, blame themselves or lose their bliss along the way.

"Alberta Falls" 10x8 by Bill Davidson OPA
“Alberta Falls” 10×8 by Bill Davidson OPA
When we are blasted by deadlines and schedules and worries, take some time to be a human being. Just play with the two questions above and you may just start to unravel more of who you really are as an artist and a genuine person. Do not over-commit yourself or you lose both your happiness and creativity. Recent studies have shown when we work too hard we think we are being creative when in fact we have lost both our happiness and creativity to over-burdensome work and time constraints. Often I have to turn off the lights in workshops to cause people to take breaks and bring fresh eyes to their paintings.
When you are unmotivated, don’t ask yourself what the world needs or what would sell, “ask yourself what makes you come alive and then go do that. Because what the world needs is people who have come alive” – Dr. Howard Thurman
So why not learn from a few notables who have achieved extraordinary success.
I love the comments of, I believe, Everett Raymond Kinstler in one of his videos:

“I start out in this way thinking, ‘this will be the greatest painting of this subject matter ever painted.’ Later in the process I think, ‘this will be the greatest painting of this subject matter I ever painted,’ and finally I think, ‘Hell! I hope I can save this painting!’ [paraphrased]”

Doesn’t this help you chuckle at yourself and free you?
When Richard Schmidt was asked he stated,

“I just paint. I don’t consider my place in history. And don’t blame yourself when something goes wrong. Just learn what you did wrong and don’t do it again. [paraphrased]”

I appreciate Scott Christensen for his help along the way and his piece of advice: “always paint for yourself.” We should always remember this when we are watching others sell a certain genre or style that does not ring true to who we really are.

"Moving Waters" by Bill Davidson OPA
“Moving Waters” by Bill Davidson OPA
Most of us can’t see color, values and shapes all at the same time. A wise artist once told me if I did value studies for two years I would advance rapidly. I love color and I knew that would be the end of my career because it would kill my motivation. The answer of course is to do a whole painting but step-process it. I don’t like to draw with pencil. I love paint so I draw shapes with paints. The key is to make it enjoyable for you in the process and use what you enjoy and do best.
Most representational artists know strong abstract design underlies every piece of representational art, and values are the bones. So interesting shapes and design, held in unity by values, are the backbones of all good paintings. The process for being accepted in OPA shows is very fair and when looking at 2000 or so paintings it becomes real obvious how much the above statement is true.
At higher levels most artists are painting spots of color and value and not objects. Painters say a great painting is greater than its sum of its’ parts. The only way that can be achieved is to paint from the heart, for all really great art is created from the heart.
"Seaward" 40x30 by Bill Davidson OPA
“Seaward” 40×30 by Bill Davidson OPA
Joseph Campbell’s advice in The power of myth is absolutely true: “follow your bliss and doors will open to meet you.”
Perhaps if we all stay more motivated we will all create better art and most importantly enjoy the process more. This is always something I confess to have to be aware of — because as a past lawyer that only focused on results, and now a reformed artist — nothing is clearer to me than that, if the process is enjoyable, I will paint more often and better.
I find that artists are generally humble, share freely and are kind to one another. I consider myself lucky to have found such a great group of people and friends. I think it important that we, as artists, always share what we know. It is often so hard to paint good paintings, so we all need the fresh eyes and keen advice of other artists — as our friends and colleagues. I encourage you to celebrate the awards and excellent paintings of your fellow artists — that’s what makes being an artist really enjoyable. Hope to see you soon, whether in nature or at a show.

Make Preliminary Drawings The First Step In Your Portrait Process and Get the Painting Right the First Time

Joyce Pike · Jul 23, 2012 · 3 Comments

Every portrait painting is the result of a series of steps. Some artists have fewer steps than others, and most artists are eager to grab their paints and dive right into the color process. But those who simply pose their model and start painting are taking a lot of chances, such as improperly placing the model on the canvas or discovering a more interesting pose once you’ve already begun. After many hours of your hard work and your model’s patient posing, you don’t want to wipe it all off and start over again.
That’s why preliminary drawings are such an effective portrait tool because they help solve problems before they happen. Drawings let you map out your subject and get acquainted with all the hidden things you’ll need to know about him or her. Take bone structure, for instance — every skull is similar, but there are always subtle variations that can make a big difference in the portrait. You must be as aware of the unseen side of your subject as you are of the visible side. If you’re guessing, the viewer will know it.
Use drawings to get to know your subject before you begin the actual portrait. For some artists this may take no more than a few sketches and suggested values.
This kind of familiarity also pays off because with a live model, no matter how good a model he or she is, your subject is frequently changing. There are many muscles in the human head, more than in any other part of the body, and nearly all of them move when the expression changes on the subject’s face. If you can learn some thing about what muscles made the expression you want, then you can compensate for subtle changes (A smile, for instance, consists of much more than just upturned corners of the mouth.)
Put a little preparation into each portrait you do by starting off with preliminary drawings. You’ll soon find that a little investment up front can save you a lot of trouble later on, and it brings an important step closer to making your portraits the best they can be.
I have a good friend, Frank, who has wonderful bone structure. Every bone is right up front where I can see it. I snapped two photos of him, not pretty, smiley photos, but character studies. I wanted to show his bones and wrinkles off to their greatest advantage.
Portrait Pointer: when you can’t find a model who is willing to sit for several hours, go for photography. Be ready with your camera when a great face comes your way. Just remember, don’t just copy the photo, study the bone structure and value patterns the same as you would when using a live model. Measuring is very necessary. Remember, every skull is different. Don’t generalize. Drawing is not only necessary to portraiture but a beautiful and fun form of art.

  • « Go to Previous Page
  • Page 1
  • Interim pages omitted …
  • Page 75
  • Page 76
  • Page 77
  • Page 78
  • Page 79
  • Page 80
  • Go to Next Page »

Footer

  • Home
  • About
    • Mission, Policies & Bylaws
    • Board of Directors
    • Presidential History
    • Frequently Asked Questions
    • History
    • OPA Staff
    • Contact Us
  • Membership Services
    • Member Login
    • Membership Information
    • State & Province Distribution For Regionals
    • Update Member Information
    • Membership Directory
    • Contact Membership Department
  • Events
    • Exhibitions
    • Online Showcase
    • Lunch and Learn
    • Virtual Museum Road Trip
    • Paint Outs
  • Resources
    • Brushstrokes Newsletters
    • Ship and Insure Info
    • Lunch & Learn Video Archives
    • Museum Road Trip Video Archives
  • Services
    • Sponsorship Opportunities
    • Scholarships
    • Critique Services
    • Workshops
    • Have A HeART Humanitarian Award
  • Online Store
  • Awardees
  • Blog
    • OPA Guest Bloggers
    • Blogger’s Agreement (PDF)
    • Comment Policy
    • Advertisement Opportunities

© 2025 OPA - Oil Painters of America · Design by Steck Insights Web Design Logo