• Skip to primary navigation
  • Skip to main content
  • Skip to footer
  • Help Desk
  • My Account

OPA - Oil Painters of America

Dedicated to the preservation of representational art

  • Home
  • About
    • Mission, Policies & Bylaws
    • Board of Directors
    • Presidential History
    • Frequently Asked Questions
    • History
    • OPA Staff
    • Contact Us
  • Membership Services
    • Member Login
    • Membership Information
    • State & Province Distribution For Regionals
    • Update Member Information
    • Membership Directory
    • Contact Membership Department
  • Events
    • Exhibitions
    • Online Showcase
    • Lunch and Learn
    • Virtual Museum Road Trip
    • Paint Outs
  • Resources
    • Brushstrokes Newsletters
    • Ship and Insure Info
    • Lunch & Learn Video Archives
    • Museum Road Trip Video Archives
  • Services
    • Sponsorship Opportunities
    • Scholarships
    • Critique Services
    • Workshops
    • Have A HeART Humanitarian Award
  • Online Store
  • Awardees
  • Blog
    • OPA Guest Bloggers
    • Blogger’s Agreement (PDF)
    • Comment Policy
    • Advertisement Opportunities
  • Show Search
Hide Search

Technology

The Elephant in the Studio…

Thomas Kitts · Apr 10, 2023 · 21 Comments

Michelangelo Riding an Elephant

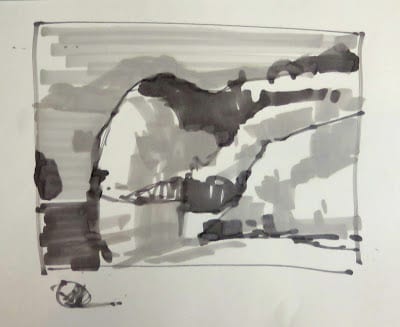
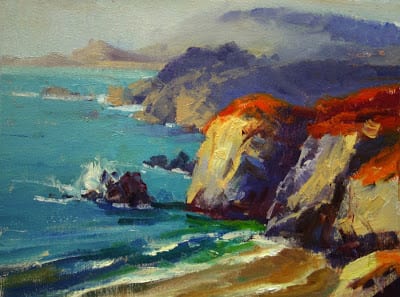
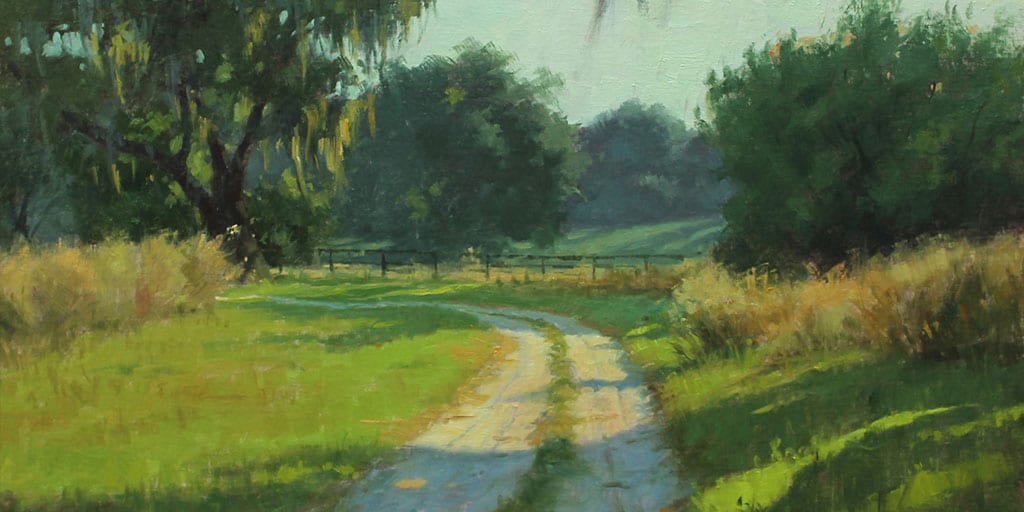
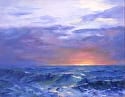
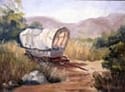
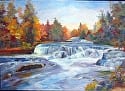
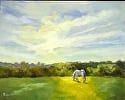
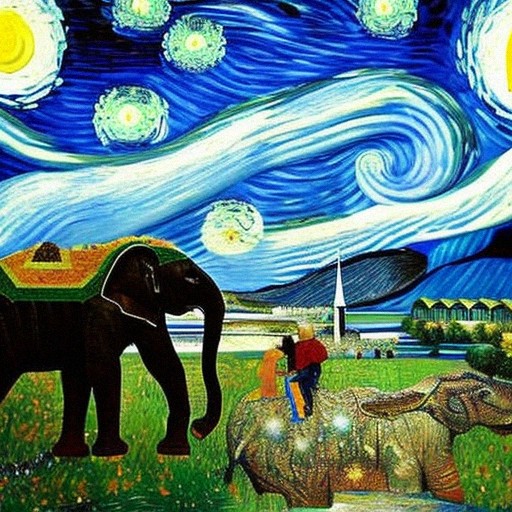
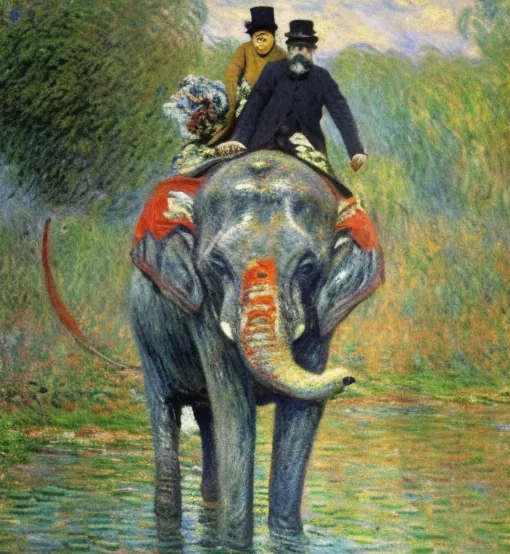
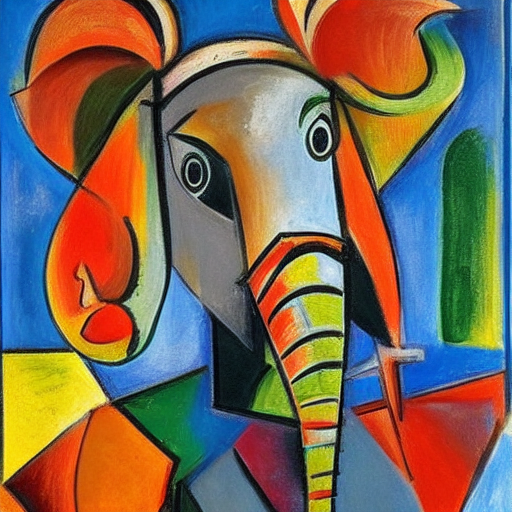
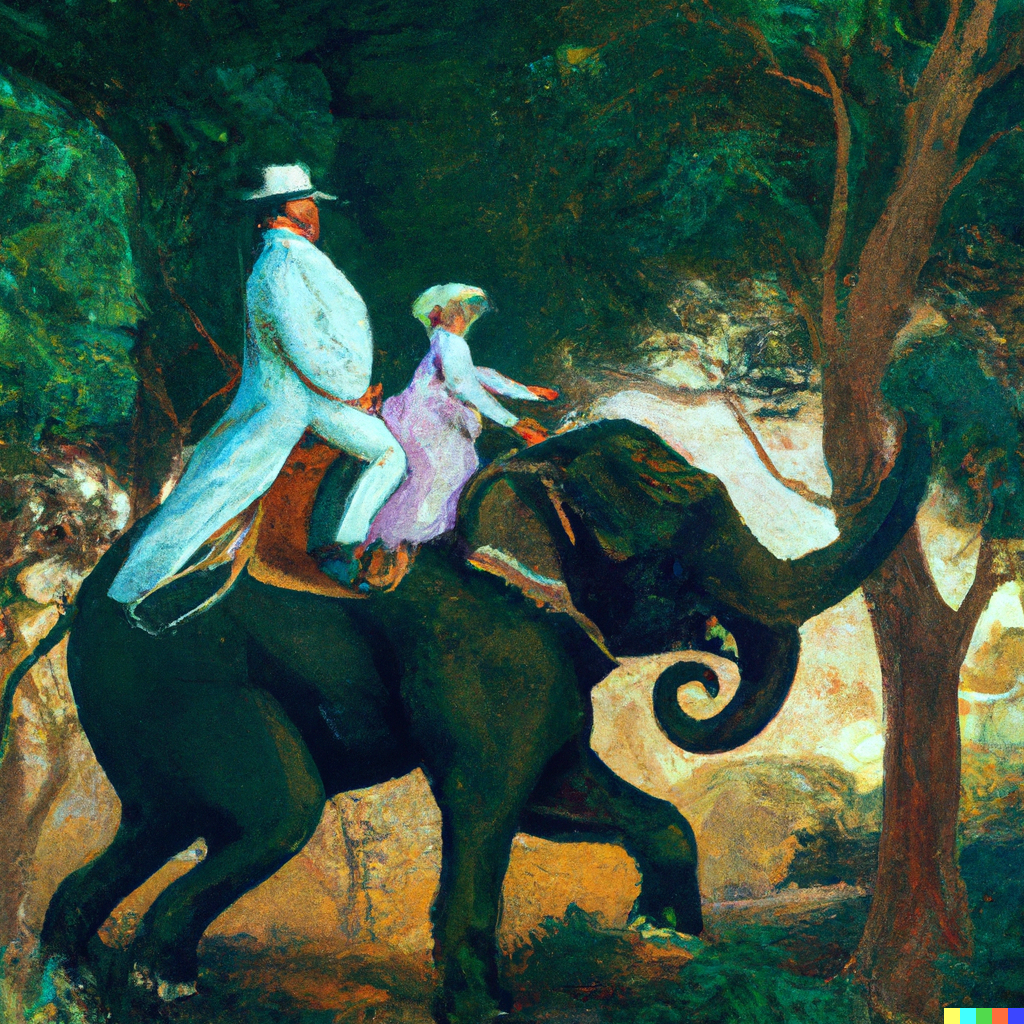
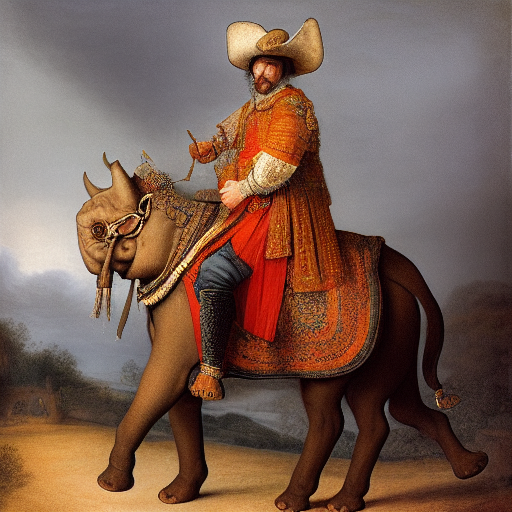
[Ed. note: Illustrations will consist of AI generated images of well-known historical painters riding an elephant in their painting style.]

Artificial Intelligence + Art. 

Is it intelligent? Is it art?…

Cheap, fast, evocative imagery has been the goal of many painters for decades, if not centuries. But if you haven’t been paying attention to the recent advances in Artificial Intelligence (a term I will shorten to AI) and how it is being applied these days, I have some news for you.

AI image generators are now here and they are being used to produce artwork for little to no cost. While most of what you see today may seem amusing or weird you need to know technology of AI is still in its infancy. AI art will continue to quickly evolve and disrupt the world of fine art soon. It is already creating turmoil in the fields of photography, illustration, gaming, animation & film. So believe me when I tell you AI will start disrupting your world too.

But what is AI art? And why should you care? In simple terms, AI art is produced by entering text descriptor into an online AI engine and waiting for the engine to return a digital image assembled from similar images scraped on the internet. There is little to no skill required, just a brief description of what you want combined with a seed image to style the result.

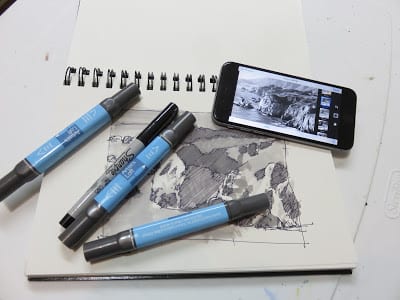
All the illustrations included in this article have been generated by me using three AI engines with a similar prompt: “[Name of famous painter] Riding an Elephant”. Each engine appears to have its own quirks and specialties.

Van Gogh Riding an Elephant

So if you are a professional artist, or have aspirations to become one, there are several things you want to monitor: specifically, how fast AI technology is advancing. The glitches and oddities we see today will be gone within 6 to 12 months, making it difficult for everyone to differentiate between a photo of painting and an AI generated image pretending to be a painting.

AI can produce an image that may appear at first glance incredibly realistic. That is until you look more closely at the image and realize it is a digital pastiche gone horribly wrong. Hands with six to twelve fingers, heads with mis-aligned eye sockets, odd-looking pupils, too many arms & legs sprouting out of a torso or head. (For examples, see some of the elephants in this article.) The realistic veneer AI can produce feels simultaneously authentic and creepy – a perfect example of what the animation industry has long called falling into the Uncanny Valley – a phrase coined to express what was once considered a paradox: the closer a computer gets to replicating reality, the more humans are creeped out by the remaining gap between CGI and reality. But the Uncanny Valley shrinks everytime CGI software is updated and eventually that gap will close completely and you will never know if an image is real or not.

So now you know what AI art is. But more important, how will it impact you and your art? Unless you make your living producing surreal or fantasy art, probably not much yet.

Yet.  –  I predict AI technology will fundamentally change how the world views and values art. Why? Because soon there will be so much AI art produced that the sheer volume of it will alter our cultural tastes and unless new laws are drafted and implemented quickly the technology will run rough-shod over existing copyright law and change our idea of what it means to control our own work.

I have a close friend who is a well-known, painterly illustrator. He is litigant in a class-action lawsuit with three AI engines that have scraped his work more than 200,000 times. His work was not only scraped for his imagery and style, his name has been illegally attached to some of the AI output, which is what his lawsuit is about. (An image, AI or not, is not considered a forgery until someone attributes it to an artist who did not produce it.) The fact that my friend is so well-known and popular, and works at such a high level in the industry, makes his work a prime target for AI engines. 

Monet Riding an Elephant

The definition of art forgery can be reduced to this: You and I have the right to copy an artist’s style and content as much as we wish, be they well-known or not, but the moment you or I assert the work we’ve created was produced by the artist we copied we are committing fraud. Fraud does not occur when someone makes an image. It occurs when they lie about who made the image.

In rough numbers, 3 to 5 billion images are uploaded to the internet every day and that number will keep rising. If you don’t believe this factoid, google it. This means at the top end 57,246 images are uploaded every second! All the paintings you and I have posted online are now being scraped by AI bots seeking to appropriate them for someone else’s purpose and profit – and therein lies the problem.

Under the revised 1977 US Copyright Laws, as soon as the work is completed, a copyright is created and owned by the creator. No other action is required to generate a copyright.

However, if AI bots are able to scrape every image online and reassemble bits and pieces of them all into a “new” image for someone else’s benefit, you won’t know when, how, or where your work was scraped. Or how it is being used. (My friend was able to determine the extent to which he had been scraped by checking with www.HaveIBeenScraped.com – a site that is no longer online.)

So the AI legal questions become: Can a bot be creative? Can it produce an “original” work of art by combining images from other artists’ oeuvre? Is creativity an act limited to humans or can a bot produce an original as well? And when it becomes impossible to differentiate between images produced by a human and a bot (which will happen soon) will such distinctions matter? Remember, AI can appropriate your time, effort, expertise, and yes, even years of sacrifice without offering you compensation.

I am not talking about the future. The future is now.

Like many painters today, I started out as a designer, art director, & illustrator. I spent 30 years in the biz, both as an employee and later as the principal of my own firm. I was good at what I did and enjoyed every minute. I made good money until I decide to shut it all down and become an artist. (Which is story for another time.)

Picasso Riding an Elephant

During the same period, I invested a lot of time and resources into learning how to paint at a professional level. I produced work to sell in galleries and exhibit in museums and built up a personal collector base. Not an easy thing to do when you are holding down a 60 hr/wk job or running a design practice. And if that wasn’t enough, I also chaired a four-year BFA program for ten years where I was responsible for developing curriculum, hiring and firing, maintaining national accreditation, and yes, teaching undergrads on a daily basis throughout the week.

AI can do most, if not all of these tasks now. Or it will be able to soon. Both in the commercial and academic sectors.

I have always visualized mass culture as a gigantic amorphous swamp in which competing trends and topics burp and bubble their way to the surface, often without logic or apparent cause and effect. But now, due to the massive amount of information collected from you and I as we consume everything from food to media – the Big Info/Service/Entertainment Complex has become a cultural behemoth loosely synchronized by the sale and exchange of our information. For example, consider how pop music and block-buster movies are engineered today: Not written. Not filmed. Not scripted or directed via artistic intuition. Instead, engineered, verified, and market-tested before being released to the public. These industries use your data to anticipate or shape social trends in the hope that such granular knowledge of you and I will guarantee a return on their money. AI will be applied to every artistic discipline because it reduces corporate risk. In effect, AI will homogenize the content you and I experience.

Here is another prediction from me. (aka Mr. Plein Air Nostradamus). AI will pervade our society to the point that high-end art collectors will start seeking out what they believe is the authentic; meaning, what verifiably comes from a human. Art that expresses the human voice and condition. And if that voice resonates with them, those collectors will be happy to pay a premium for it.

Sorolla Riding an Elephant

If you have read this far then you are probably a painter. If you aspire to make a living from your work then focus on putting your own voice in your work – not in the giclee prints you produce, or the merchandise you hope to license. Put your voice into your originals because that will be what will makes your work meaningful to others. If you produce only originals, one-offs, then the demand for your voice will become stronger, because if there is only one of something, it is the original, and collectors like originals.

So with regards to AI, what can you do? Think about what makes your voice resonate. It may feel narcissistic to frame your motivation this way, but what you and I do is inherently narcissistic so cop to this fact and move on. After all, we artist must become a little self-focused if we are to survive the oncoming uncertainties of our chosen calling.

Rembrandt Riding an Elephant

In the end you and I will not be able control how AI bots impact our community because there is too much money at stake. And to be fair, there is an upside to AI. It will increase efficiencies in critical service sectors such as healthcare, investment, manufacturing, travel, energy production, conservation, and more. So AI will have a positive impact on most people.

But by all means future-proof yourself by pouring your singular voice into your work. To steal a quote: “Now get out there and go do the voodoo you do so well.”* Focus on your own creativity but keep strengthening authentic relationships with your friends, peers, and collectors because they will be the people who continue to value what you do.

–––––––

* If you are of a certain age like me, you might think this quote comes from Mel Brook’s “Blazing Saddles’ but it does not. It was coined by Cole Porter in a 1929 song and later appropriated by Harvey Korman for the 1974 movie – a perfect example of the burp and bubble of our cultural swamp.

Notan Sketch VS. iPhone 6

Rusty Jones · Aug 10, 2015 · 5 Comments

“Notan” is a Japanese term referring to exploring the harmony between light and dark. Artists use Notan sketches to explore the composition elements of a scene and the relationship of major shapes. A good Notan drawing simplifies a scene into three values…dark, light and halftone. It also acts as a memory and planning tool that helps the artist focus on essential elements of a scene, draw simple shapes and record important elements should the scene change as weather and sunlight alter a scene.

 
I was first introduced to the importance of the Notan sketch in a workshop I took with Skip Whitcomb. Skip starts every painting session with two or three quick sketches of the scene. The process takes him about thirty minutes. As part of the workshop Skip required students to do at least three sketches before starting a painting. Since that time I have come across many artists that rely on the Notan sketch process and for years it has been my practice as well.
The advantage of a Notan sketch over a camera is the camera records everything in the scene indiscriminately leaving nothing to the imagination. That being said I have come to prefer the camera over the sketch as the smart phone increasingly takes over every aspect of our life. Using the photo app in my iPhone has reduced the time to produce a Notan to a matter minutes rather than a block of time that cuts into painting time.
I recently took the opportunity to produce a Notan sketch and a Notan photo to decide once and for all what my routine was going to be going forward. Below are my results.

South of Monterrey on the way to Big Sur is this amazing scene, painted by many. On the day of my painting the fog was rolling in and out all day constantly changing the light. The scene was so captivating it was hard to decide what to leave in and what to take out. It was the perfect time for a Notan sketch so by the time I put brush to canvas most of the major decisions would have already been made.

Like many plein air painters my “go to” format is the horizontal on a 9″ x 12″ or 12″ x 16″ panel. I also like the long, narrow horizontal format I use frequently in Texas due to the lack of mountains or anything taller than a fence post. My first inclination was the long horizontal as seen in my Notan which took about ten minutes.

Just for kicks my second sketch was a square format and my third sketch was my usual horizontal.

The whole process took longer than expected because of the fog that would come in and obscure the distant cliffs that I wanted to include in my painting so all total it took almost forty minutes to get the sketches done.
Simultaneously when the sun was just like I wanted, I took a single photo with my iPhone and as the fog destroyed my scene, I quickly opened the photo app
to look at the scene in different formats.

I first looked at the long, horizontal format, cropped it accordingly and saved the image for future reference.
Blog-1-image6
Then I cropped the same photo in the more typical horizontal for a 9″ x 12″ painting. Again I saved it for later.
Blog-1-image7
Then I used the halftone filter to give me a Notan photo of my scene. The whole process took less than ten minutes which is an important consideration when the goal was to produce four paintings this day.
Blog-1-image8
“On the Way to Big Sur” 9″ x 12″ oi/linen
When it came time to paint, the fog became unavoidable. In the end I gave in and included it in my painting, but the Notan exercise was well worth the effort.
 
Below is another example of sketch versus photo Notan.

I’m a sucker for old farm houses and this one is a favorite. I quickly produced two Notan sketches.
The long horizontal.
The standard format. Then I created Notan photos.
The long horizontal
The standard format.
The halftone Notan.

 
The painting.
“Historical” 12″ x 16″ oil/linen

There is something that makes me feel more “artistic” drawing Notan sketches before beginning a painting. But at the end of the day, for me at least, its all about evaluating the scene for composition and values and the iPhone provides me the quickest means to an end while also providing me a permanent record. In less than ten minutes I can produce several Notan photos with complete halftone evaluations of my scene and I think it gives me a clearer understanding before I begin to paint.

Getting the Most Out of Your Camera

Bill Farnsworth · Aug 3, 2015 · 6 Comments

Featured-Image-OPA-Getting-Most-Camera
Just about every representational artist knows the benefits of painting from life. The naked eye can see far more than a camera and constantly adjusts for each lighting situation. Our other senses tell us if it’s windy, hot, cold, and fragrant. All this affects the painting of the scene before us. For some artists, the painting must be finished in the field that day or subsequent days. For others, field studies and photographs are part of process in creating their painting.
The huge movement of Plein Air in the country has given birth to countless Plein Air paint outs, workshops, and new artists. Art suppliers and magazines are selling everything from easels to ad space to feed this new hunger for painting outside. There is a common misconception that “Plein Air” is a style or look. Artist’s for more than 100 years painted outdoors as a means to accurately document real life. Field studies were just part of the process to creating a painting. Zorn painted from life but used photography on occasion to help in the creating his masterpieces. Like a brush, the camera is a tool. You don’t buy cheap brushes, so don’t buy a cheap camera. If you are seen at a Plein Air event with a camera nobody will make you turn in your wide brimmed hat.
In fact, the camera will help you document a new area to get ideas for painting sites. When I attend Paint Out events, my camera is always with me. If I see a great scene with fleeting light that will be gone in 20 minutes, I photograph it. Taking shots panned back, up close, vertical, horizontal, and all around, I write down the time. The next day I come back an hour earlier and paint my block in while anticipating the coming light. This approach works very well because the night before I have viewed my photos and picked the best composition. So when it’s paint time, I don’t get hung up on too many problems. If I’ve been to the same paint out for several years I have lots of photos to look over and go back to those familiar places and have a solid idea to paint. You can waste hours looking for something to paint. In unfamiliar territory, I’ll sometimes use google satellite and hover over areas that might have some possibilities to paint. You can use street view and cyber drive through the countryside. If something looks good I’ll mark it on a map. My years as an illustrator made me resourceful in finding new ways to help in the craft of picture making.
The camera is also very useful when you are visiting a wonderful place for a short time. You can document the area with hundreds of photos as opposed to only having the time to paint a few studies. Back in the studio with no field studies, I must have very high quality photographs and view them on a large monitor. It’s best to paint soon after your photo reconnaissance, so your memory is still fresh and you remember what grabbed you in the first place. I know from experience that my darks tend to get inky and lights get washed out. Your camera’s aperture tries to give you all the values, but misses in high contrast situations. Our eyes adjust constantly while painting from life. So in the studio I need to open the shadows and darken the washed out lights. Color saturation can be gone as well, so I’ll adjust that too, and make sure my canvas is in proportion to the photograph or study. An inch one way or another will change a composition, and you may lose what you set out to do. If I have no field study, I’ll paint one in the studio and work out the problems first. With a complex scene and wanting to combine several photos, I’ll use photoshop and create my composition.
I like to use figures in my landscapes and photography is the only way to record a moving person. Sometimes while painting outside a figure may walk into the scene, so I’ll take a quick shot. In the studio I have the best documentation with a field study and a quality photograph of the figure to create my painting.
When photographing your finished painting it is very important to have a set up where you have diffused natural light and a solid tripod that you can level. Glare can be a common problem and is caused by another light source like a window.
So the camera can be a great tool in your art career as long as you understand it limits and know that nothing will replace painting from life.

Bill Farnsworth OPA
Bill Farnsworth OPA
billfarnsworth.com
bill@billfarnsworth.com

My Favorite Photo-Editing Tool: Instagram. Right on your Phone.

Aimee Erickson · Jan 6, 2015 · 1 Comment

There are moments when I feel like I’ve been waiting my whole life for the iPhone and Instagram to be invented. I so often see things that catch my eye—everyday scenes, sweet little compositions, visually appealing scenes I notice. My sketchbook is one way I observe and record this stuff— I have a whole shelf of sketchbooks. Painting right on the spot is another. But sometimes I am just not fast enough—the scene might be fleeting, or I might be fleeting. This is when a camera comes in handy, especially when it is already in my pocket. Usually my photos don’t quite show what I saw, though, because my photography skills are only fair to middling, plus the camera is indiscriminate and my eye is usually picking out some particular thing.
Instagram has a dozen or so built-in filters that change the look of a photograph. By changing the color and contrast, by darkening the edges (“vignetting”), by using selective focus and blurring the rest of the photo—and you can control all these effects individually—it allows you to see different ways of visually interpreting the same scene. Just play around with it until you get the effect you like. Pretty neat.
Now of course iPhone photos are not terribly high-res, particularly after you crop to an area that is maybe one-fiftieth the size of the original (like I did in the example above). But so what. I’m using them as reference for paintings, or just to make a photo for my own entertainment. If I paint from it I don’t need that much detail anyway.
If you want to save the edited photo to your phone’s camera roll without publishing it on your Insty feed, just do a screen capture when you’re done editing, and then crop it in your photo viewer

Edited photos can be used as scrap for paintings just the way we used to use regular old print photos. I mostly try to get the composition I want and then make the color how I want it.

Here are some of the effects you can get, applied to a photo of a still-life setup.

As painters we have an ability–some say an obligation–to make choices about how we see, what we choose to put into a painting from all the visual information available to us. Expanding and strengthening this ability is important. In a way, Instagram can show us different ways to interpret an image–seeing more or less contrast, joining shadows together or showing definition in shadow, showing more or less color.

Photographing Your Artwork

Tom Schmidt · Feb 17, 2014 · 6 Comments

These notes were presented by Tom Schmidt at the 2009 OPA National Meeting in Santa Fe, NM.

Tom SPhotographing your artwork is fairly simple if the proper procedures are followed and it is done under the proper conditions. With the advent of digital photography, good results can be obtained even by someone not deeply into photography. However some care must still be taken. One should not just point a camera at the painting and shoot. Further, in 2003 and 2004 a major revolution occurred in photography, and that is the switch from film to digital imaging. At that point, film photography became essentially obsolete. A few purists still use it especially in the larger formats, but everyone else has switched. It is now difficult often to get film processed even if one can find it to purchase. That being the case, this talk will largely cover digital photography, although some notes on the use of film will be included.

BettyS4
Headed Home
By Betty Schmidt
Oil on Canvas
16″ x 20″

  1. First consideration: What do you want to do with your photographs?
    1. Keep a record of your work after it is sold
      1. A digital record can be kept on:
        1. A computer hard drive
        2. A compact disk or DVD
        3. a flash drive or camera memory card
      2. A print on paper or canvas
      3. A film slide or transparency

  2. Enter contests, competitions or shows.
    1. Entries usually must be in digital form in a format and size specified by the organization soliciting the entry.
    2.  Some organizations may also request a print since digital images may vary between various computer monitors.
    3.  A few still require slides

  3. Make a portfolio to show your work to galleries or other interested parties.
    1. Regular photographic prints can be pasted in a scrap book
    2.  Computer prints can be made directly on pages to be inserted in a bound book. Such pages can contain explanatory data if desired
    3. A web site can serve as a digital portfolio
    4.  A CD or DVD can also be used.

  4. Make Giclée prints for sale
  5. Submit for publication in a magazine or other high end printed material.

  • Second consideration: What type of camera to use?
    BettyS5
    Sailing st Sunset
    By Betty Schmidt
    Oil
    22″ x 28″

    1. For most purposes a standard digital camera with a resolution of 5 mega pixels or better is sufficient.
      1.  Most paintings do not contain extreme detail as found in regular photographs so high resolution is not necessary
      2.  A zoom lens is a great convenience since this removes the need to move the camera back and forth to fill the frame.
      3.  A digital single lens reflex is usually not necessary since digital cameras have a liquid crystal display on the back which shows exactly what the camera will see and this allows exact framing.

    2. If you plan to make large prints and your painting is larger than 20” by 24”, you will want a higher resolution camera. At least 10 mega pixels resolution is required.
    3.  For really big paintings to be printed full size, a view camera with a scanning back is needed. These are very expensive and usually only owned by professionals.
    4. If you will use film:
      1.  At least a 35 mm single lens reflex is required. The view finder of other types is offset from the lens so it does not see exactly what the lens covers and one cannot accurately frame the picture.
      2.  For extreme detail, a medium format reflex or a large format (4 x 5 or larger) view camera is needed. However, most publishers no longer require such images.

    5. Regardless of the camera used, a tripod of other firm support is needed. Exact framing and focus cannot be retained without such equipment.
    6. Even with a tripod in use it is wise to use a remote or cable release or the camera self timer to prevent any camera movement.
    7. Do not use a wide angle lens since many wide angle lenses show barrel distortion. This makes the straight edges of a painting bulge out. Probably the widest angle lens which should be used is the equivalent of a 35 mm lens on a 35 mm camera.

BettyS6
Afternoon Shadows II
By betty Schmidt
Oil
16″ x 20″


  • Lighting. Entire painting must be evenly lighted. Whatever source is used, it must evenly illuminate the painting. Uneven lighting produces bright or dim areas.


  1. Many people like outdoor lighting
    1.  It is usually even and diffuse, minimizing unevenness and glare spots.
    2.  It can give natural color
    3.  It is usually bright enough to produce a good exposure without pushing the sensitivity of the camera
    4.  However, it can vary greatly in color
      1. Normal sunlight is fairly neutral in color, and “daylight” film is balanced for this light.
      2. Cloudy sky or shade or “north light” are blue and will produce bluish photos.
      3. Early morning or late afternoon light is orange and will produce reddish photos.
    5. Outdoor photography is always at the mercy of the weather.
      1. Extreme heat or cold may be problems
      2. Precipitation can ruin any photo shoot.

  2. Artificial light has many advantages.
    1.  Since it is usually used indoors, weather is no problem
    2.  It is uniform in color and can be color and intensity controlled.
    3. However, it may be uneven, depending on the source and any reflections.

  3. There are several types of artificial light
  4.  The most common is incandescent, as from a normal light bulb.
    1. This light covers a broad spectrum with no peaks or valleys.
    2. It is usually yellow orange in color and produces orange photos unless corrected.
    3. Halogen lights are incandescent but produce whiter light than normal incandescent lights. I prefer this type of light.
    4. These lights produce a lot of heat which could damage paintings if left on too long
  5.  The second type of artificial light used in photography is electronic flash.
      1. Electronic flash produces white light similar to daylight but often somewhat bluer.

    BettyS7
    Clipper at the Rock
    By Betty Schmidt
    Oil
    24 x 24

     
  6. Never use on camera flash to photograph a painting
  7.  
        1. A hot spot will be produced in the center of the painting by light reflected directly back into the camera.
        2. Any glare spots in the painting (as from glazing or varnish) will show up as bright dots.

  • The third type of lighting to be considered is fluorescent lighting
    1. Fluorescent lamps, particularly tubular types, produce even light, are cool, and can be had in various colors.
    2. Fluorescent lamps do not produce even amounts of light throughout the spectrum. This can make accurate color rendition impossible.
    3. With custom white balance settings, a digital camera may give an acceptable but not good color rendition.
    4. With film cameras, color correcting filters are available for fluorescent sources but they do not do an acceptable job.
  • Lighting placement- The prime consideration is avoiding reflections and glare.
    1.  In an outdoor situation, avoid shadows and dark areas.
    2.  The best indoor arrangement is a brightly lighted room with white walls and ceiling. This avoids direct lighting, its reflections and shadows.
      1. If you can, bounce the lights off the walls or ceiling
      2. If you bounce off the ceiling only, the bottom part of the painting may not get as much light as the top, causing uneven exposure.
      3. Any color in the walls or ceiling will change the color of the reflected light and the apparent color of the picture.
      4. If you must use direct lighting such as from photo-flood lamps in a reflector, use two lamps placed at a nearly 45 degree angle to the painting.
      5. I you must use flash, use two remote or slave units placed at 45 degree angles to the painting, or placed to bounce the light off the walls and ceiling.
    3.  If the painting is varnished or glazed, some small spots may be reflectors aimed directly at the camera. These will show up as bright dots in the picture. These are often a big problem.
      1. A very diffuse light source will minimize this problem.
        1. If using flash illumination, double polarizing the light may help. Here, one polarizer is placed over the camera and another set at 90 degrees to the first is placed over the light sources. These polarizers absorb a lot of light so getting enough for a god exposure may be a problem.
        2. If objectionable spots still remain, the only remedy is to greatly enlarge the image in an editing program and individually remove them by cloning or blurring them out.


BettyS8
Conestoga
By Betty Schmidt
Oil
12 x 16


  • Color (white) balance. As previously mentioned, every light source has a different color. This color affects the appearance of the painting.


  1. The brain corrects for this appearance change to some degree particularly if there is no reference color in view.
  2. The camera cannot automatically correct for light source color changes so we must tell it how to compensate.
    1.  With film cameras, the film manufacturers include this compensation in the film. You buy indoor or outdoor film as needed.
      1. Indoor film is designed for use with incandescent light. If used outdoors, the photos are very blue. Indoor film is now very hard to get and quite expensive.
      2. Outdoor film is designed for use in bright sunlight.
        1. If used in incandescent light the photos are very orange.
        2. If used under cloudy or shady conditions, the photos will be somewhat blue. To get proper color, a pink filter must be used.
        3. If you wish to use outdoor film under incandescent light, use halogen lights with a  #80A and a #82A filter. This will reduce the film sensitivity by 2 stops, so you will need a lot of light.

    2.  With digital cameras, a number of settings are placed in the menus which allow one to make the necessary corrections electronically. These are called white balance settings. Here, the camera changes color sensitivity to make white look white under the light at hand.
    3.  Digital cameras usually have a number of possible white balance settings.
      1. The most common is “automatic” white balance. Here the camera calculates its own white balance. For ordinary outdoor photography, this is the setting most often used, and it usually gives fairly good color rendition even with electronic flash.
      2. A second useful setting is “incandescent. This corrects for the orange color of this light source. If used outdoors, it produces blue photos.
      3. A third setting is “cloudy” or “shade”. This corrects for the bluish light found under these conditions. It will produce a reddish tint under normal conditions.
      4. The camera may have one or more settings for fluorescent light. These often are specific for certain types of bulb, knowledge you may not have. If you want to use these, experimentation will be necessary.
      5. The best color rendition is obtained using a setting called “custom” or “preset” white balance. Here, you use the camera to actually measure the color of the light source in use. Each camera type has its own procedure for doing this, so you must read the manual. Generally the camera is set to a “measure” setting and then aimed at a white or neutral gray surface and activated. This setting is retained as long as the camera is on, but may then be lost. The custom white balance setting gives the best possible rendition of all colors under the lighting conditions under which it was set. I recommend this setting whenever paintings are to be photographed.

  • Background.
    BettyS9
    Bond Falls II
    By Betty Schmidt
    Oil
    24 x 36

    1. The background which shows in the photo must be plain and neutral.


  1.  If you can manipulate the photo digitally, crop it to show only the picture, or if permitted, the picture and its frame.
  2.  If you cannot crop, use a neutral solid color backdrop of some kind.
  3.  A grey or black background is best
    1. A dark background is best because shadows from the frame or stretcher bars will not show on the edges of the picture. With light backgrounds such shadows are a problem.
    2. For film photographs where only cropping in the camera is possible, a black background should be used because when projected, only the picture and not the background will show.


BettySchmidt10
Afternoon Snack
By Betty Schmidt
Oil
16 x 20


  • Hang your painting with a concealed support such as a nail in a wall. Do not place it on an easel where the support shows. It is then wise to level the painting using the spirit level/
  • Do not try to lay the painting flat on the floor and shoot from above since it is almost impossible to exactly center the camera over the painting. If the painting is not


  • Camera position. The camera must be level and centered on the picture.
    BettySchmit14
    Lakeside Birches
    By Betty Schmidt
    Oil
    14 x 10

    1. First, the picture must be hung vertically and level from side to side. A small spirit level should be used to assure this alignment.
    2. Second, the camera on the tripod should be centered on the picture
    3. Third, the camera should be leveled side to side on the tripod, again using a level. This is done with a ball head mount or by adjusting the length of the tripod legs.
    4. Fourth, tilt the camera up or down to a level position, placing the spirit level against the front of the lens.
    5. Fifth, open the zoom lens so that slightly more than the picture area is included and raise or lower the level camera until the picture is centered in the viewer.
    6. Finally, zoom to include the desired coverage, and shoot.
      1. For a picture 12 inches in the smallest dimension or larger, crop to the edges of the picture.
      2.  For a smaller picture, you may want to show some background. A small picture viewed too closely may show certain undesired features such as:
        1. the grain of the canvas
        2. areas not completely covered with paint
        3. small unwanted brush strokes


BEttySchmidt11
Watering Can
By Betty Schmidt
Oil
12 x 9


  • Adjusting the photo. Unless you are shooting slides. The photo will probably require some adjustment.


  1. Slides usually cannot be adjusted once exposed. If you know your exposure is slightly wrong, the photofinisher may be able to slightly “push” the whole roll if you request this. However, generally you get what you shoot. Therefore unless you are very confident of your technique, it is wise to bracket your exposures with slides.
  2. If using print film, your photofinisher will normally adjust color and brightness to what he thinks is right. Since he cannot see the original, this adjustment is often not to close to reality/
  3. With commercially processed digital photos, again the processor will usually adjust the photos as he wishes. Some photofinishers have in store adjusting stations where you can make some adjustments (typically cropping and brightness) which will be incorporated in the final photos. If you do not process your own photos, these processors are highly recommended.
  4. If you have a computer, you will probably want to adjust your own photos.
    BettySchmidt12
    Bailey’s Harbor Range Light
    By Betty Schmidt
    Oil
    20 x 16

    1.  There are many photo editing programs available, some simple, some complex.
    2.  You should choose one early on and become very familiar with its use.
    3.  In most cases, shooting the photo is only half of the picture. Adjusting it is the other half.
    4.  Proper adjustment makes the difference between an average photo and an excellent one.
    5.  I never print a photo without some adjustment.

  • Adobe Photoshop is the premier editing program in use today.
    1. It comes in two levels.
      1.  the full version (CS 3, CS 4 or higher)
      2.  Photoshop Elements which is somewhat simplified but still very good particularly for the nonprofessional.

    2. The full version is so complicated that no one ever completely masters it. However it is almost without limit in what it will do. It costs about $600.
    3. Photoshop Elements contains most of the commonly used features of the full version plus an organizer which allows one to sort and rearrange photos into groups and classifications. This program costs $100 or less. It is the program I use, so I will detail some of the procedures for its use.
      1. Elements contains two versions of editing program, “Quick Fix” and “Standard Edit” One often starts the adjustment process in “quick fix” then switches to “standard edit” when needed, even on the same picture.
      2. Both allow
        1. A common top tool bar
        2. rotating and cropping,
        3. zooming with the mouse wheel or a tool
        4. automatic or manual brightness and contrast adjustment
        5. color adjustment
        6. use of layers
        7. undoing undesired adjustments
        8. size and resolution adjustment
        9. Changing aspect ratio to stretch or compress a photo to fit a frame shape.
        10. saving in a variety of formats

      3.  “Quick Fix” has fewer tools available but some of those included are not present in the “Standard Edit” version.
        1. Quick fix uses sliders for most adjustments, allowing faster adjustment.
        2. It allows one to see the picture both before and after changes are made

      4. The “Standard Edit” version has a lot of tools, many of which are necessary for a quality adjustment. Included are:
        1. Cloning (transferring pixels from one area to another, thus replacing the first area
        2. Burning and dodging to lighten or darken areas
        3. Incremental rotation to straighten a picture
        4. Perspective adjustment
        5. Selective blurring, sharpening and smudging.

      5. Photoshop can do very extensive modification of pictures. When photographing art work, the object is to make the photo look as much like the original as possible. If you make the picture different from the original, you may be deceiving the customer and this might be classed as fraud.


BettySchmidt13
Icycles
By Betty Schmidt
Oil
16 x 18


  • Printing. If you want to make prints of your painting, there are number of ways to do this. The method chosen will depend on many factors.


  1. If you want just a few prints not larger than 8 x 10 and don’t want to invest in equipment, a commercial photo finisher is the method of choice.
    1.  You submit a camera memory card or a CD containing the image
    2.  Make or request any desired adjustments
    3.  Receive your prints, often within an hour.
    4.  The prints are done on photosensitive paper using the wet chemical process which has long been in use.
    5.  Prints usually done on glossy paper and are quite light and age stable.
    6.  Cost may be as low as 16 cents each for a 4 x 6 print
    7.  For large photo type prints, professional photo labs can produce large high quality prints at reasonable but not low cost..

  2. If you want a lot of prints (100 duplicates or more) or brochures, a commercial offset printer or a copier service may be the answer.
    1.  Copier quality may be mediocre but cost per copy may be as low as 39 cents each. Copies must be made from a printed original
    2.  Commercial printers usually want large jobs but quality can be good or excellent. Costs per copy for small runs can be high but larger volumes greatly lower the per copy cost. All commercial prints today are made from digital originals.

  3. If you want only a few prints and can invest in some equipment, many good computer printers are now available.
    1.  Be sure the printer you choose is designed for photo printing. Many office printers are designed for speed or economy and may not produce high quality photo prints.
    2.  There are 3 types of computer printers available, ink jet, laser and dye sublimation.
      1. Today the ink jet type is the most commonly used for art prints.
        1. It is actually a carefully controlled mini spray gun.
        2. Older types used clear dye solutions as inks.
        3. Newer types often use pigmented inks containing small solid particles of colored material

      2. A second type is the laser printer which is often used in offices.
        1. Laser printers use toners which are small colored particles attracted to an internal drum by electrostatic force. The particles are then transferred to the paper and fused onto it by heat from a laser.
        2. Laser printers are fast particularly when using a single color, and produce stable prints.
        3. Laser printers are not as good at reproducing color as ink jets.

      3. A third type of printer is the dye sublimation printer. These are slow and expensive to use, and no longer often found.
    3.  Printers using pigmented inks are best for photo printing because these inks are much more light and age stable. Older dyed inks are not light and age stable, and usually do not produce as vivid or accurate colors.
    4. Lower level printers use 4 ink colors and can produce quite good copies.
    5.  Higher level printers use 7 to 9 ink colors and produce excellent copies.
    6.  Printers capable of 8.5 x 11 prints using pigmented inks are available for less than $100.
    7.  Larger and professional printers can run from $500 to over $5000
    8. Professional printers usually produce at least 13 x 19 prints and some can produce prints up to 6o inches wide and long.
    9. Professional level printers often can print on a variety of substrates including canvas, hence can produce Giclée prints.
    10.  The best photo printers are those made by Canon, Epson, or Hewlett Packard.
    11.  Any printer used for serious color printing should be calibrated, as should the monitor that indicates the colors it will be fed.
      BettySchmidt15
      Botanic Garden
      By Betty Schmidt
      Oil
      9 x 12

      1. Monitor calibrators can be obtained from Pantone Color Vision and others. These include a colorimeter which measures the screen colors and software which will correct the screen.
      2. Printer calibrators which cause a test object to be printed and then scanned are also available.
      3. When a calibrated monitor is in use, one can adjust a test photo to closely duplicate the subject photographed, then print test prints, adjusting the printer controls until a good print is obtained.
      4. Every paper or substrate prints differently so individual calibration is necessary.
        1. Computer drivers for each substrate can usually be obtained from the printer or substrate manufacturer. The computer must then be set for the substrate in use before printing.
        2. Even with the proper driver in place, the printer must be calibrated with each substrate in use

  4. Giclée  printing. A Giclée is the term commonly used for a high quality ink jet print, often on canvas.
    1.  Giclée prints are the most common quality reproductions of artwork used today.
    2.  The prints are so good they are often mistaken for originals by unsophisticated viewers.
    3.  With today’s inks, Giclées are stable for many years and under some light exposure.
    4.  Giclées  can be produced quickly in small quantities, eliminating the need for large inventories necessary with other quality printing methods.
    5.  Giclée  size can be readily changed without reprocessing.
    6.  A digital image is used as the master for a giclee` print.

  5. A printing method often used in the past for art prints is the serigraph.
    1.  A serigraph is a high quality screen print. Here, the inks are forced through a fine mesh screen with a squeegee.  Areas not to be printed are masked by a plastic which fills those openings.
    2.  New screens are required for any size change.
    3.  For color paints, 4 masks are needed, one each for the cyan, yellow,  magenta, and black ink. Since four separate screenings are required, accurate registration of the screens on the work is required.
    4.  The main advantage of the serigraph over other large volume printing processes is that the screens are much less expensive to make than regular or lithograph plates.
    5.  Masked printing screens have a limited life, often only a few hundred prints.
    6.  Screen printing screens are made from film negatives, not digitals.
    7. Serigraph prints have been almost completely replaced by giclee`s.

  6. Another print method often used in the past for art prints is the lithograph.
    1. Lithograph prints are made with masters of stone which is etched with acid to remove areas not to be printed. Ink is then transferred from a flat surface which touches only unetched high spots on the stone. The inked stone is then pressed against the paper to print.
    2.  Colored lithographs require four printings as with the serigraph, so exact registration in necessary.
    3.  Lithograph plates are made from film negatives, not digitals.
    4.  Lithograph plates are expensive and last a long time, hence require long print runs for any degree of economy.
    5.  Lithography has largely been replaced by giclee printing for small lots or offset printing for large lots.


  • Page 1
  • Page 2
  • Page 3
  • Go to Next Page »

Footer

  • Home
  • About
    • Mission, Policies & Bylaws
    • Board of Directors
    • Presidential History
    • Frequently Asked Questions
    • History
    • OPA Staff
    • Contact Us
  • Membership Services
    • Member Login
    • Membership Information
    • State & Province Distribution For Regionals
    • Update Member Information
    • Membership Directory
    • Contact Membership Department
  • Events
    • Exhibitions
    • Online Showcase
    • Lunch and Learn
    • Virtual Museum Road Trip
    • Paint Outs
  • Resources
    • Brushstrokes Newsletters
    • Ship and Insure Info
    • Lunch & Learn Video Archives
    • Museum Road Trip Video Archives
  • Services
    • Sponsorship Opportunities
    • Scholarships
    • Critique Services
    • Workshops
    • Have A HeART Humanitarian Award
  • Online Store
  • Awardees
  • Blog
    • OPA Guest Bloggers
    • Blogger’s Agreement (PDF)
    • Comment Policy
    • Advertisement Opportunities

© 2025 OPA - Oil Painters of America · Design by Steck Insights Web Design Logo